So after wiring the garage sale florescent lights a few weeks ago, I wired the outside garage sale lights today. It all started three years ago, during our annual island garage sale extravaganza, where we hop on bikes, attach panniers and a bike trailer (coincidentally, found at a garage sale), and whiz past all the suckers in cars to see what we can score at the hundreds of houses having sales. It's usually pretty random...
Here, K bikes (and carries her messenger bag) with J up ahead... the lights I ended up installing today can be seen in the trailer, along with a pair of skis (J only used once), a porch blanket, and various other things (according to the photos, we also ended up finding an 18" square marble baking slab for K, some recessed light cans for me, and various other useful things).
Being garage sale lights (I think they were a buck or two a piece), they required some touching up with spray paint in order to match the (uhh, much pricier) Rejuvenation lights for the front porch and back door that I bought years ago.
The before -
And then after (with a coat of white paint inside, and flat black on the outside - Rejuvenation's 'oil-rubbed bronze' looks more black than anything - and I had all the spray paint in various leftover quantities in the garage so it only took half an hour or so) -
The wiring part was actually pretty easy. I pulled some existing wires to tidy up, but basically all I had to do was redo the splice (and stuff the mess in a real box with a cover on it) after running cable to where each of the three lights would be installed -
(I put the cover on after I finished the splice)
Then cut three holes in the garage -
(I have a handy template for circular fixture boxes)
(photo by K)
Then pull the wires through and splice them -
(photo by K)
Then just connect the three fixtures -
Turn the circuit back on, cross fingers, and... flip the switch by the back door...
Success! And for fun the back door light for comparison -
Yeah, it's nicer and more 'Arts & Craftsy' but... cost about three hundred times more, so these will do nicely for the garage. Afterall, it's nice just having light out there with the flick of a switch by the back door.
Actually, they're almost too bright, so I may replace them with 40W white bulbs (I got 65W clear ones). But anyway, light...
Showing posts with label garage. Show all posts
Sunday, August 14, 2016
Sunday, July 10, 2016
garage lighting [part one].
I guess after ten years of having a bare light bulb hanging up in the center of the garage and barely being able to see anything in there at night, it was time to amp up the lighting. Randomly, on our traditional Memorial Day camping trip to Salmon La Sac, we passed through the ol' town of Ronald and - lo and behold - off the side of the road some dude was having a yard sale and selling four fluorescent light banks. He had $15 marked on each, but all I had was $40 so I bargained him down to that much for all four. Boom.
After spending the better part of an afternoon a few weeks ago diagraming the garage circuits, I figured out what I had to do. I seriously don't know how electricians work... I've been as bewildered about wiring circuits in my house as I was about this one in the garage. Whoever wired it up decided to bring in power, then split it so half would go to a light on the backside of the garage, while the other half would go to a box in the middle of the rafters where that bare bulb hung. From that box, he/she brought power back to a switch, as well as split it out to the far corner.
Then there's another circuit that has a switch by the backdoor - I'll get to that next, when I install and wire three exterior lights in a bit.
And lastly, there's a whole other circuit that comes in the side, and seems to be powering a single outlet that is on the outside of the garage. There's a dead wire that just ends (of which I'll connect a receptacle so I can run power tools off that 20A circuit instead of the one now with all the lights), and a 220V outlet in the other far corner (that I know my old neighbor Trevor tapped into while he was building their house next door and living in a trailer, but that was before I had bought this place).
So anyway, wiring schematics are fun, but it was time to install these yard sale lights...
First I went around and just hung them all with self-tapping screws. And yep, that circular box is where the bulb had been (I pulled the wire running back to the switch cos I was going to use as much of that 30' or so as I could to string between the four light banks - instead bringing in power from the box a foot-and-a-half away).
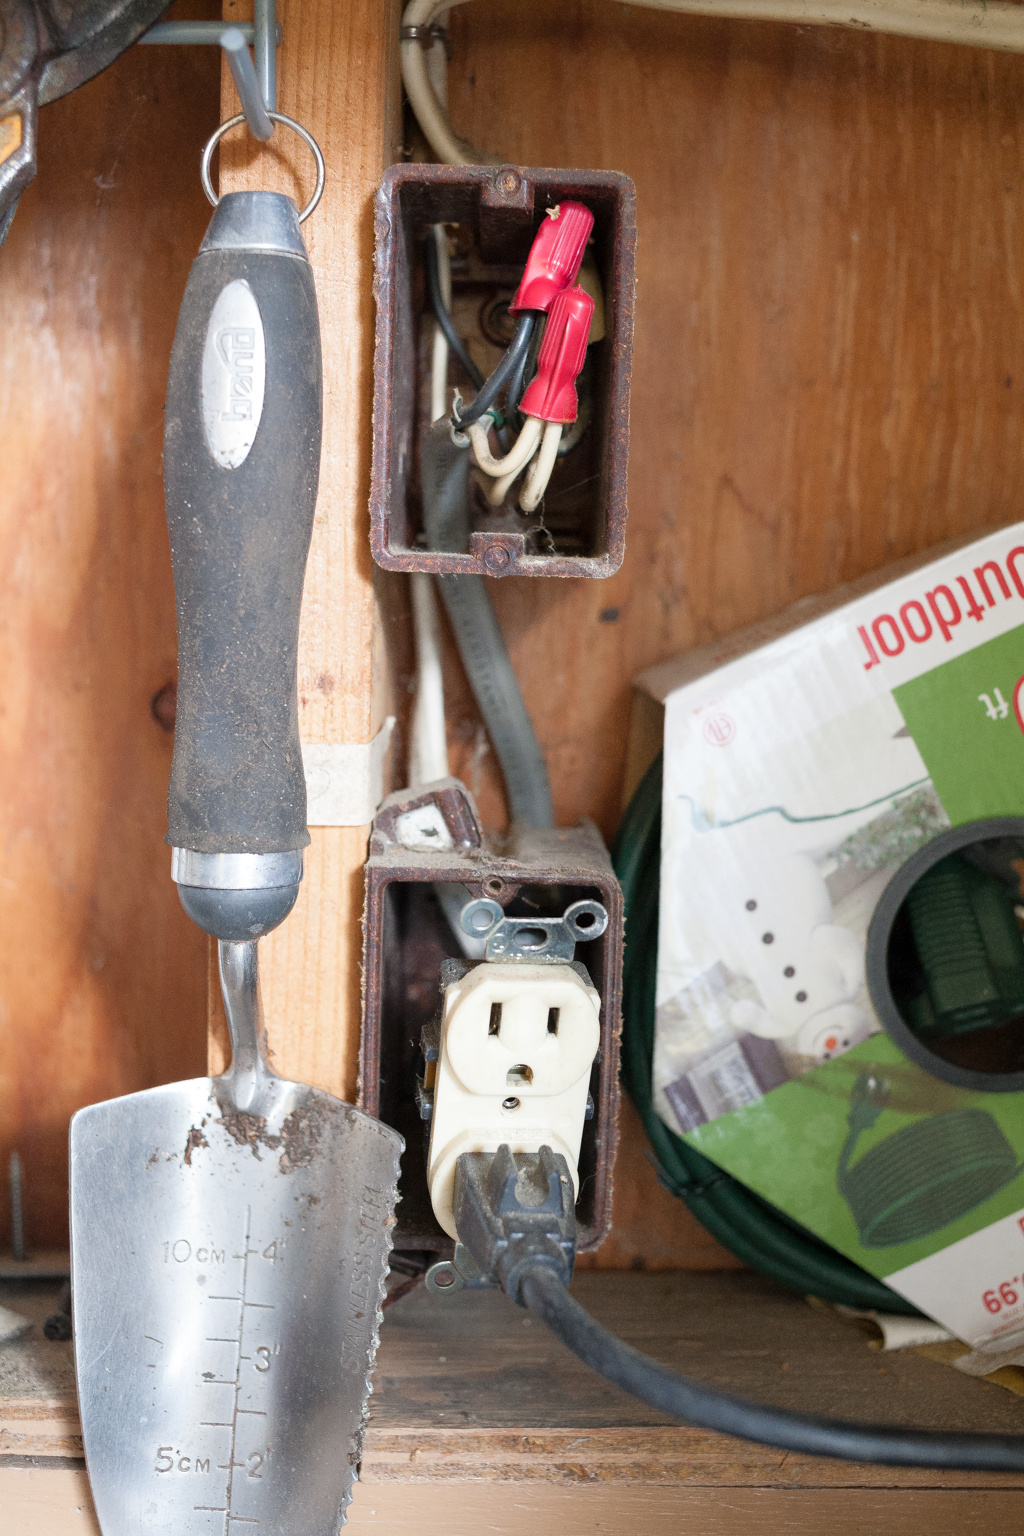
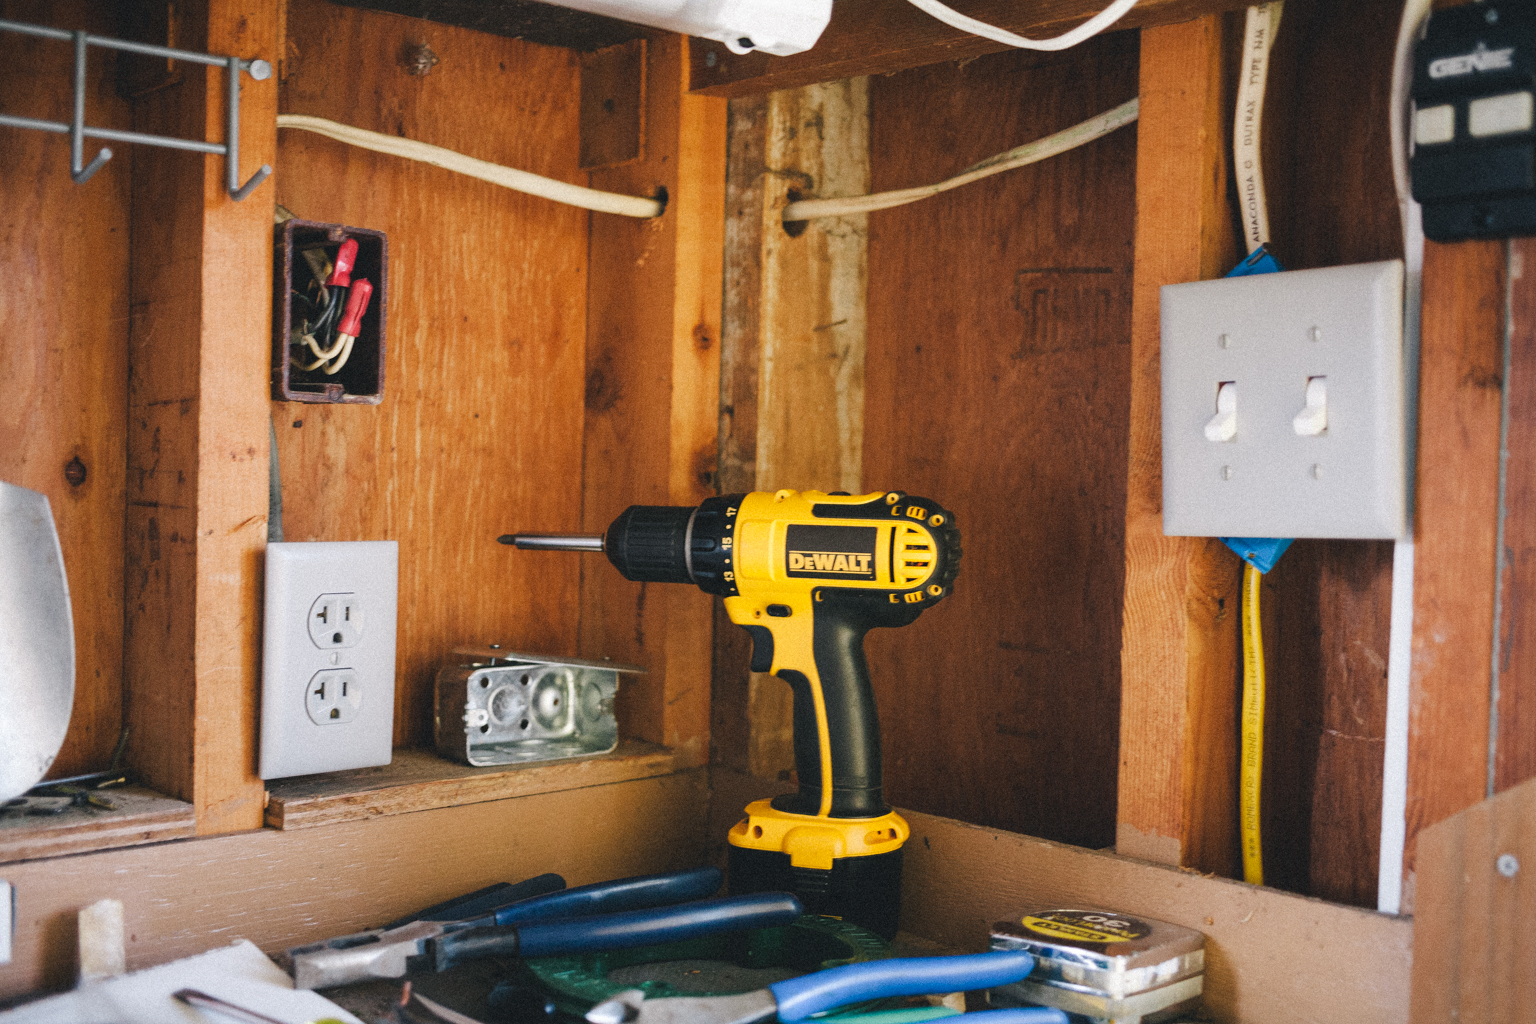
The corner was sort of a mess... The outlet is where the one circuit I was messing with came in, and the box above it is the other circuit (which just held the splice between the cable that came up from underground and the one that ran to now-gone exterior lights - of which I'll install three new ones soon and redo that box - heck, I'll even cover it so there won't be bare wire splices just hanging out). The switches then on the right flipped on the bare bulb and an exterior light on the backside of the garage (handy - but I'm going to replace it with a motion-sensor light I picked up at a garage sale a month or so ago for $5 so the new switch will just stay 'on').
A closer look at the two boxes for those circuits...
And the new switches - the one on the right will be for the new lights, the one on the left is for that backside light...
But since I wasn't using the end-line circuit the crazy electrician had wired, I had to pull power from that outlet box where the circuit from the house was coming.
Easy-peasy. I just pigtailed the hot and neutral to reconnect the receptacle, while pulling power over to the switch and then running each light fixture in parallel.
And done...
Then it was finally time to, well yeah, string the cable between all four fixtures. This, uhh, took longer than expected...
I was sort of killing myself working with 12-gauge cable (I could've used 14, but it's a 20A circuit and so whatever - the newer 12-gauge seemed more supple than the old stuff I pulled and reused, but that could also just be cos that cable is, well, probably thirty years old). But after a couple hours it was done, and the garage now has a bit more light than that bada** bulb was putting out...
So yeah... next will be wiring and installing those three exterior lights (I picked them up years ago at - yep - a garage sale, so I'll have to spray paint them an oil-rubbed bronze to match the front porch light and backdoor light that cost a touch more), and then installing that garage sale motion light so when we go back behind the garage to take out the compost after dinner it'll light the way for us...
After spending the better part of an afternoon a few weeks ago diagraming the garage circuits, I figured out what I had to do. I seriously don't know how electricians work... I've been as bewildered about wiring circuits in my house as I was about this one in the garage. Whoever wired it up decided to bring in power, then split it so half would go to a light on the backside of the garage, while the other half would go to a box in the middle of the rafters where that bare bulb hung. From that box, he/she brought power back to a switch, as well as split it out to the far corner.
Then there's another circuit that has a switch by the backdoor - I'll get to that next, when I install and wire three exterior lights in a bit.
And lastly, there's a whole other circuit that comes in the side, and seems to be powering a single outlet that is on the outside of the garage. There's a dead wire that just ends (of which I'll connect a receptacle so I can run power tools off that 20A circuit instead of the one now with all the lights), and a 220V outlet in the other far corner (that I know my old neighbor Trevor tapped into while he was building their house next door and living in a trailer, but that was before I had bought this place).
So anyway, wiring schematics are fun, but it was time to install these yard sale lights...
First I went around and just hung them all with self-tapping screws. And yep, that circular box is where the bulb had been (I pulled the wire running back to the switch cos I was going to use as much of that 30' or so as I could to string between the four light banks - instead bringing in power from the box a foot-and-a-half away).
The corner was sort of a mess... The outlet is where the one circuit I was messing with came in, and the box above it is the other circuit (which just held the splice between the cable that came up from underground and the one that ran to now-gone exterior lights - of which I'll install three new ones soon and redo that box - heck, I'll even cover it so there won't be bare wire splices just hanging out). The switches then on the right flipped on the bare bulb and an exterior light on the backside of the garage (handy - but I'm going to replace it with a motion-sensor light I picked up at a garage sale a month or so ago for $5 so the new switch will just stay 'on').
A closer look at the two boxes for those circuits...
And the new switches - the one on the right will be for the new lights, the one on the left is for that backside light...
But since I wasn't using the end-line circuit the crazy electrician had wired, I had to pull power from that outlet box where the circuit from the house was coming.
Easy-peasy. I just pigtailed the hot and neutral to reconnect the receptacle, while pulling power over to the switch and then running each light fixture in parallel.
And done...
Then it was finally time to, well yeah, string the cable between all four fixtures. This, uhh, took longer than expected...
I was sort of killing myself working with 12-gauge cable (I could've used 14, but it's a 20A circuit and so whatever - the newer 12-gauge seemed more supple than the old stuff I pulled and reused, but that could also just be cos that cable is, well, probably thirty years old). But after a couple hours it was done, and the garage now has a bit more light than that bada** bulb was putting out...
So yeah... next will be wiring and installing those three exterior lights (I picked them up years ago at - yep - a garage sale, so I'll have to spray paint them an oil-rubbed bronze to match the front porch light and backdoor light that cost a touch more), and then installing that garage sale motion light so when we go back behind the garage to take out the compost after dinner it'll light the way for us...
Monday, October 21, 2013
rooftops and garage doors.
So for some inexplicable reason the garage has gotten a lot of love this summer-and-now-autumn...
Earlier in the summer I totally cleaned it out and organized it taking a load to the dump and one to Goodwill. It was a huge improvement and we could actually see the backwall (where I took to hanging our bikes).
Next - and I never mentioned this cos it didn't seem that exciting... though in the vein of full documentation of this little house I am mentioning it now... A couple years ago on a trip to the Puyallup Fair I intentionally stopped by one of the booths of a dude selling garage doors (intent on actually updating the ugly fiberglass garage door after having finally painted it, hanging new trim and building a gable vent and installing cedar shakes like I did on the front of the house earlier that summer).
But all the garage doors were the uninspiring cookie-cutter kind that looked like everyone else's so I never called the guy back (though I gave him points on his dedication for trying to persuade me).
And I'm cheap.
But finally this summer it got to me... so I did something. With some oil-rubbed-bronze-type spray paint I had left I first painted all the ugly aluminum hinges and handle -
Then I primed the door with some leftover Kilz.

Earlier in the summer I totally cleaned it out and organized it taking a load to the dump and one to Goodwill. It was a huge improvement and we could actually see the backwall (where I took to hanging our bikes).
Next - and I never mentioned this cos it didn't seem that exciting... though in the vein of full documentation of this little house I am mentioning it now... A couple years ago on a trip to the Puyallup Fair I intentionally stopped by one of the booths of a dude selling garage doors (intent on actually updating the ugly fiberglass garage door after having finally painted it, hanging new trim and building a gable vent and installing cedar shakes like I did on the front of the house earlier that summer).
But all the garage doors were the uninspiring cookie-cutter kind that looked like everyone else's so I never called the guy back (though I gave him points on his dedication for trying to persuade me).
And I'm cheap.
But finally this summer it got to me... so I did something. With some oil-rubbed-bronze-type spray paint I had left I first painted all the ugly aluminum hinges and handle -
Then I primed the door with some leftover Kilz.
OK - so far so good and not a dime spent... Next I had to decide on a color... this was tough. I wanted something bright that would contrast with the otherwise pretty Earthy palette I had chosen so far (traditionally - the door contrasts the most with the rest of the palette whilst keeping roughly in the same saturation/lightness - so on an HSB scale the hue can contrast pretty drastically but the other two should be about the same as the rest of the palette - and... I digress... ). But sticking of course to the Benjamin Moore Historic Collection... HC-10 Stuart Gold it was -
And in an afternoon the garage door went from some weird tan-ish fiberglass to bright yellow -
I'm still not entirely sold on it but... another afternoon and $20 worth of a quart of Benjamin Moore paint and I can fix that.
That was back in July... fast-forward to this weekend where it was time to put on a new roof.
I don't have any good before pictures that show the roof covered in stupid pine needles and moss - but it was time to replace it. No doubt the original roof from when the garage was built sometime back in the eighties... the roof on the house had been replaced after and didn't match the garage (thankfully cos I really kind of like the reddish-brown colour of the house shingles). And so I ordered up eight squares and an extra bundle (for the starter row) in 'Bronzed Brown' and got to work ripping off the old stuff...
(No pictures of that enjoyable process - which involved tearing them up with a shovel and tossing them over the roof into the bed of my truck waiting below - thanks Stuart!).
Here's a stack of cut tabs that I'd use for the ridge cap...
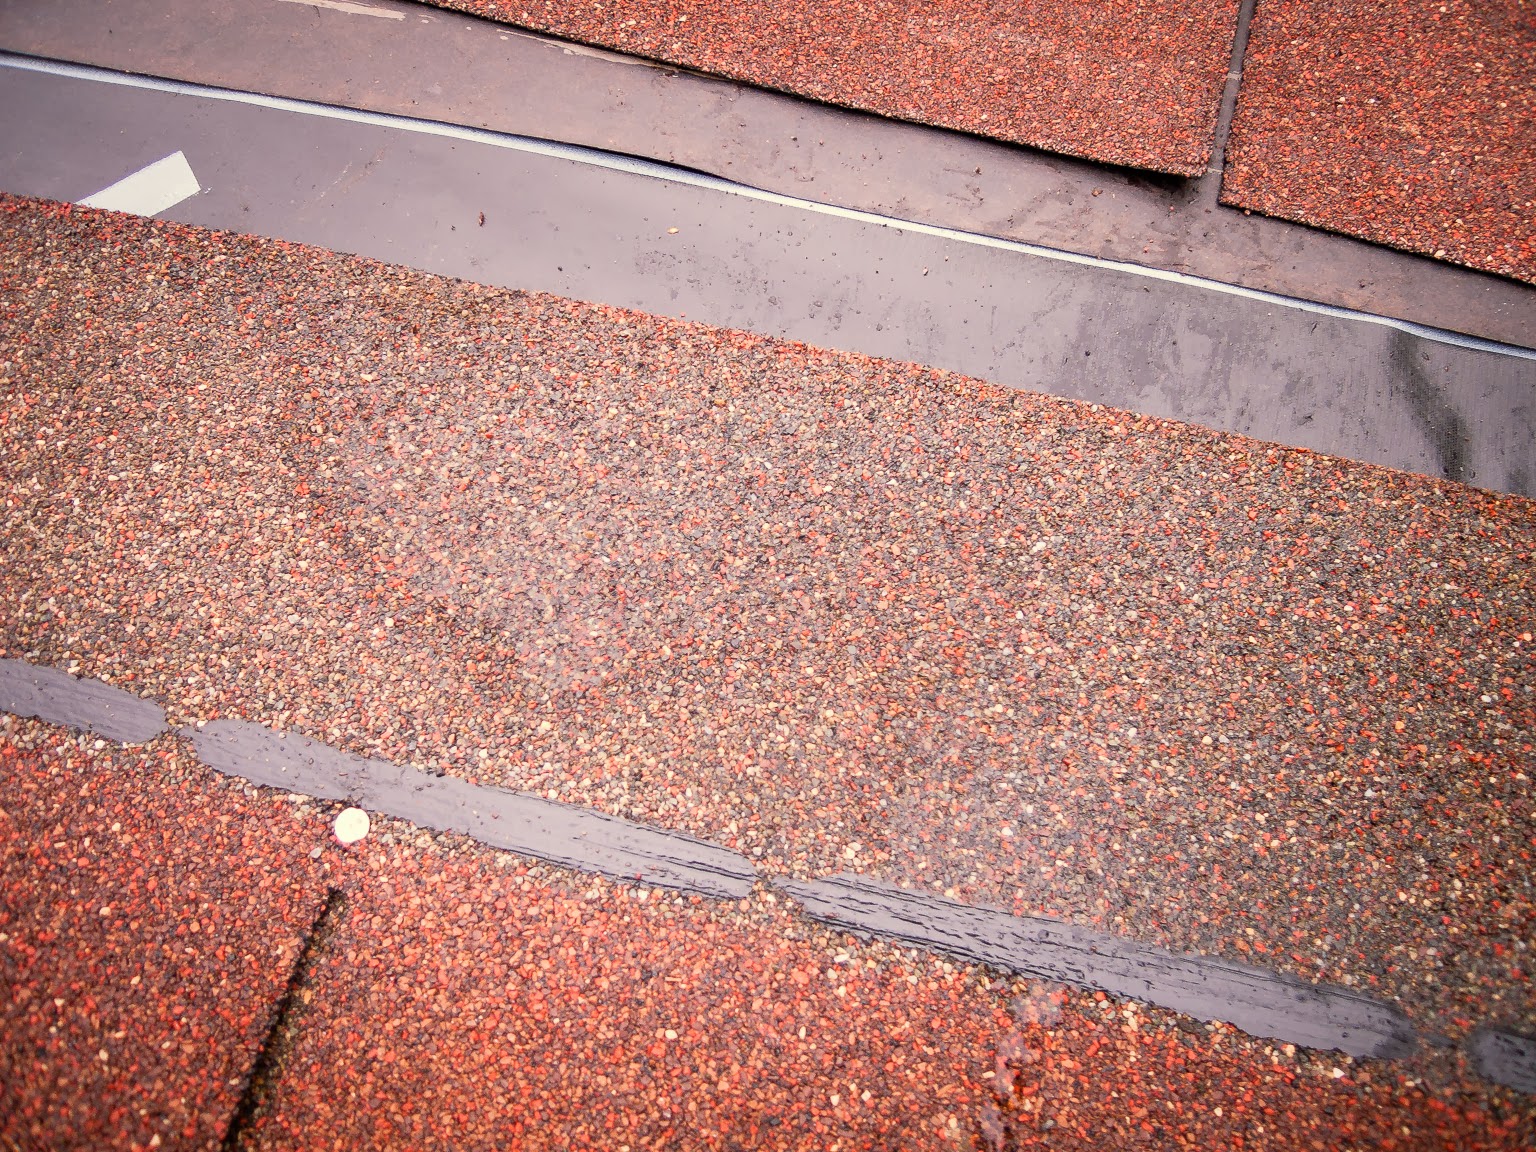
After the old shingles were peeled off and every single nail pulled Scott and I went to work laying the sealant sheeting and then... well - nailing the shingles. Lots of shingles.
But it goes fast and we had a good system... and before we knew it the first side was done -
It was - well - systematic... Cut the shingles to pre-determined sizes for the book ends -
And check the level-ness of the rows by the white line on the sheeting -
Despite the forecast calling for sunny weather it didn't really end up as such... though it never rained both mornings were wet from fog.
But like I said - despite all the methodical cutting - roofing goes quick. And before we knew it... we were done (actual drip cap now and all)...

And the garage roof now matched the house -
Still to do then (on the garage)...
- hang some lights on the outside of it that turn on with a switch by the back door (already wired)
- hang 4-6 recessed cans for better lighting inside the garage
- finish hanging the trim on the south side
- pressure wash and spray paint the gutters white
I think that's about it. Nothing terribly costly since I have most of what I need already (well - I'll probably need to buy some more cans of white spray paint). Just time. Always time.
But I had a lot of fun roofing and it looks great - nothing much more satisfying then the feeling of a manual job well done... and done right.
Thanks Scott for all your help, extra supplies and expertise!
Sunday, July 14, 2013
[homemade] ski vises.
So I knew our skis needed a fresh waxing when J and I went skiing on Rainier this past weekend. Trouble is ... I didn't want to plunk down eighty bucks or whatever for a pair of ski vises. And I had a couple of scraps of 4x4 from the porch balusters I built a few years ago.
I figured they'd make a fine pair of ski vises ... so off to crafting I went.
The 4x4 scraps were already a good height (about a foot) but they needed to be able to be secured to the bench top so I whacked off a 1x4 about a foot long and screwed the 4x4s to the end of them (so I could clamp down the 1x4s and secure the 'vises' to the edge of the bench). That was the easy part.
But I needed to have them also hold a pair of skis vertically in order to be able to file the edges. No worries. I figured a 15º angle offset would be perfect - so I dialed the table saw to 75º and went to notching the posts for a 3/4" gap (I made the notches parallel to the sides of the post because the camber of the skis would bend them slightly into the notches and hold them tight - or so was my thinking) -
Once they were notched on the table saw I just had to take a chisel to the slices -
And ... done -
I happened to have some cabinet shelf liner stuff leftover that was pretty tacky that I thought would hold the skis when flipped upside down while waxing (or right side up while adjusting the bindings etc.) -
But the real beauty were the vertical notches for edging. I cut a few extra scraps of the shelf liner to wedge into them and then tested -
It worked! And wallah - ski vises from scrap 4x4s ha!
Now ... if only it were November and the powder was on its way ... but our skis are freshly waxed (thanks to a $3 yard sale iron - definitely no need for a fancy ski iron either) for - uhh - summer skiing (no no I'm serious - I'm skiing every month this year - and next year ... and next etc. - apparently there are people who can count over a hundred months straight of skiing - now that's legit!).
I figured they'd make a fine pair of ski vises ... so off to crafting I went.
The 4x4 scraps were already a good height (about a foot) but they needed to be able to be secured to the bench top so I whacked off a 1x4 about a foot long and screwed the 4x4s to the end of them (so I could clamp down the 1x4s and secure the 'vises' to the edge of the bench). That was the easy part.
But I needed to have them also hold a pair of skis vertically in order to be able to file the edges. No worries. I figured a 15º angle offset would be perfect - so I dialed the table saw to 75º and went to notching the posts for a 3/4" gap (I made the notches parallel to the sides of the post because the camber of the skis would bend them slightly into the notches and hold them tight - or so was my thinking) -
Once they were notched on the table saw I just had to take a chisel to the slices -
And ... done -
I happened to have some cabinet shelf liner stuff leftover that was pretty tacky that I thought would hold the skis when flipped upside down while waxing (or right side up while adjusting the bindings etc.) -
And ... boom!
But the real beauty were the vertical notches for edging. I cut a few extra scraps of the shelf liner to wedge into them and then tested -
It worked! And wallah - ski vises from scrap 4x4s ha!
Now ... if only it were November and the powder was on its way ... but our skis are freshly waxed (thanks to a $3 yard sale iron - definitely no need for a fancy ski iron either) for - uhh - summer skiing (no no I'm serious - I'm skiing every month this year - and next year ... and next etc. - apparently there are people who can count over a hundred months straight of skiing - now that's legit!).
(one of the ugly cabinets that was hanging up in the garage that we cleaned up and spray painted - then stickered away with the ski theme cos it's now our über-cool ski cabinet).
Monday, September 19, 2011
yep ... more garage stuff.
So I've been making progress on the garage - surprisingly given everything I've got going on at the moment. Since getting back from MO, it's been off to my home in the mountains every weekend as I squeeze in every second I can there before winter sets in - so working on the garage has been all about eeking out every hour I can - usually in the evenings and (in the case of this weekend) in the rain.
I had to finish the rest of hanging the trim on the frontside before I could move forward, so I did that quickly -
Then I had to get those fake architectural beams in place which meant Katie had to hold them on the outside while I drilled them from the inside. This was one of the rare times when I really don't know how I would have gotten them up without the help of someone else. So - with her help (thanks Katie!) - they went up pretty well -
I used a scrap piece of 2x8 to fit them where they needed to be horizontally to line up with the to-be new fascia. To figure out where the notch would go on the actual fascia, I would use that scrap and then measure the remaining distance to the end of the eave and add them together to get where I needed to cut -
and then I got the first 2x8 up -
Then the other two beams -
And also tacked up the roofing felt before starting to hang cedar -
The cedar would be completely hung during the evenings and in the dark - luckily long ago I bought a few of those halogen work lights which are brighter than the sun at high noon. So I'd just shine one up at the gable and it pretty much lit up the whole thing. Very convenient ... so then over the course of three evenings this past week I got it all hung -
One course at a time -
The stapler I bought last year of course was a huge help -
And then it was (almost) finished - just two more courses to go -
But one of the things I had to do was research Jeff's and my fall trip so I spent some time after work on the porch with a mug of tea, my Bugaboos guide book I picked up at Second Ascent for like eight bucks or something and a highlighter marking off the possible routes we could climb -
(of which apparently Katie got a picture unbeknownst to me)
Then yesterday in the rain I slapped on the stain cos I really wanted to get it done before said trip to the Bugs -
And then today quick before having to head off to a wedding Julian helped me (another task where I really don't know how it would have worked without a second set of hands so thanks J!) hang the remaining fascia boards ... afix the little decorative triangle I cut out above the highest beam where the two fascias meet to cover that up (and like on the front and back of the house at the top of the gables) ... and so it is now (mostly) finished -
At least on the front. Still have more trim to hang on the other side ... obviously sand and paint all the wood fill I've used to hide the seams ... a garage door to replace ... a people door to replace ... and lights to hang. But it's starting to come together.
Now - I'm simultaneously painting all my interior doors but I'll get to that next week ...
Subscribe to:
Posts (Atom)