Showing posts with label plumbing. Show all posts

Monday, April 24, 2017

ugh. plumbing. [again]

I looked it up. It's been five years, five months, and five days since I fixed our kitchen drain plumbing for the first time. Apparently, at that time I should have been doing the walls of our bedroom, rather than cutting out a large section of our drain and redoing it.

Fast-forward. Five years, five months, and five days. I should have been doing the walls of our bathroom, rather than cutting out an even larger section of our drain and redoing it. But I'm stupid. And I guess I don't learn. Bother.

So Saturday, as I was preparing to start mudding and taping the bathroom walls... our kitchen sink drain stopped working. Again, just as it did... (yep) five years, five months, okay okay... Mother trucker.

Let me just say, that all the tips the plumbing books and the websites and the forums say to clear a stopped drain (using a plunger, followed by a snake) don't work for sh*t. They're all a load of crap.


Okay okay again. Thankfully I wasn't dealing with sewage. Just the ground up food stuff from... (yep) five years, okay bloody h*ll already...

This weekend sucked, if that wasn't obvious. But I can only blame myself, in thinking all those years ago when I remodeled the kitchen of how cool and classy it would be to install my very own garbage disposal. Heck, in that case, I can blame my parents... for having grown up in a house with one, and thinking how I was an adult and learning how to remodel my home and so, by gosh darnit, I'm gonna figure out how to install a disposal.

Except, as I've pointed out... I'm stupid.

Which is really just saying I didn't take into account simple physics. Namely, a few important nuances, including...
  1. How long the run of pipe was until it dumped into the main sewer line
  2. The slope angle of the pipe
  3. The diameter of the pipe
The run goes halfway across the house (12'), then from near the back of the house to under the crawl space (12') before dropping into the sewer drain, and it was done with 1-1/2" ABS (vs. 2", which would be less-prone to clogging for obvious reasons). That, and the plumber or whoever did the job lost nearly 6" in two 90º bends, not leaving enough for the first 12' run from the outside wall to the middle of the house to drop the (minimum) 1/4" per foot of pipe. I ended up, back five years ago, hacking some of the wall out in order to allow for that necessary slope.

And that's the minimum.

So yeah... the pipes were destined to clog. This time, for real. As in... for real for real. When I cut out the second 12' section after the second 90º bend, then cut it in pieces to get it out of the cavity in which it was built, the cross-section revealed a pipe utterly, completely, totally... clogged. With crap. While, again, thankfully... not literally. But just a step up from literal crap.

There's quite honestly nothing more fun than spending a Saturday cutting into a drain line -


Followed by clumps of years-old waste and backed up water sloshing onto your head and all over the floor. Ahh yes, certainly good times indeed. Good times, indeed.

A trip to the store to get the necessary plumbing parts, wearing the clothes covered in that stuff, was followed by first dry-fitting - then glueing - everything together. Here's the new 90º bend, where the pipe drops 4" in about, yep, 6" of length. Brilliant.


And the splice -


Right before where the drain from the bathroom we're currently remodeling (and of which I should have been mudding the walls so I can tile) joins and heads to the front of the house to connect with the sewer line -


Yeah. Phwew. And double phwew, because when I inspected the last section of pipe I had cut out right up to that junction... it was clear. Meaning, the sludge had stopped just a couple of feet before that, so I didn't have to redo any of that plumbing.

So yeah. As I cursed (K wasn't home), I also realized how foolish that was, how foolish I was. As I pulled out of the parking lot of the hardware store Sunday afternoon with my $40 in plumbing pieces, I passed a woman hobbling down the sidewalk across the street. I can walk, run even, heck... ski. I can cut up our plumbing and figure out how to fix it myself, for $40 and a weekend. Who was I to be upset? I needed to be thankful, to count all of the blessings I have.

I was frustrated, sure. We're all allowed to get frustrated from time to time. That's inevitable, and we're human. But in the end, when K turned the water on in the sink after the glue had set on all the new pipes and fittings, and I heard the sweet, sweet sound of water trickling through the plumbing above my head, all the way through the house, I smiled. It felt good.

But I'm not forgetting. Not this time. So I'll be disconnecting the garbage disposal. We bought a couple of sink strainers and will never, ever, ever, ever, ever... ever rinse another food scrap down the drain.

Ever.

No, seriously. Ever.

I mean it.


---


ps - thank you, Evon Brow, for that wonderful comment you had left all those years ago...  I really appreciated re-reading it. Now, for real, hopefully I can permanently cross this off my list of worries!

Sunday, February 19, 2017

time for (the rest of the) plumbing.

My arch nemesis... this cast iron behemoth -


My ultimate weapon of choice... my trusty sawzall, armed with a Diablo diamond grit cast iron cutting blade -


Ok, so by 'ultimate' I mean it wasn't my first. Mainly because I couldn't initially imagine how I'd cut the 2" vent stack on the right in that top photo without blowing through the finished wall of our bedroom on the other side. I got lucky with the first cut on the 1-1/2" drain, where I had just used leftover metal cutting blades I had lying around. Not wise. That took a while, and a bit of muscle. But they were short, so it was easier to not cut through the wall.

So for the larger vent stack, I went a different route: I rented a pipe cutter like this bad boy for $24. It seemed that would do the trick, without any chance of blasting through the wall directly behind the pipe. But... it failed, mainly because the chain links were too big, so even opened as far as it would go and the closest link we could attached, when we levered the beast all the way shut it only begun to dig its teeth into the iron.

Bummer.

So I broke out the sawzall, and got creative. It was the angle and length of the blade I was up against, and the fact the vent stack was about an inch from the sheetrock behind it. But I realized... if I notched the framing stud and cut with the sawzall through the notch, I could keep the angle more parallel to the sheetrock - thereby, (hopefully) not cutting into it.

I gave it a shot... and, well, it worked!


That's the cast iron with the new 2" ABS attached by a Fernco flexible coupler, and the notch in the stud is where I stuck the sawzall through to cut the cast iron pipe. It still took some muscle, and I kept spraying the pipe with water to cool it down as I cut. But about fifteen minutes or so on each of the two cuts and I could take that section of cast iron and chuck it out the front door (I actually did this, onto the driveway... it was good times).


It was then a matter of cutting and glueing all the new ABS to make the new drain where I needed it.


Well, seems simple enough. But it required doing it one piece at a time, dry-fitting, measuring, cutting. Repeat. A lot. The line jutting over from the old drain to where I needed the new drain had to slope at least the standard 1/4" per linear foot, but I just took a level to it and when it wasn't level I called it good. Strapped the section above the 90º junction to the 2x4 brace and kept going.


Oh, and redo that stupid mistake I made where I used red PEX for the cold and, well, blue for the hot.

That was a dumb, dumb idea because after I cut, refitted new PEX with the right color-coding, and turned on the water it, well... leaked. One of the push-on fittings seemed to be the culprit. And it was 11 o'clock at night, so I couldn't do anything about it until morning. So that dripped all night, and bright and early the next day I ran to the store to get a fitting to find out, well... it wasn't the fitting. It was the little 3" piece of PEX pipe. So I cut a new piece, fitted it, turned back on the water and... no leaks!


Finally... the moment of truth, where I had to move the vanity into place, connect the hot and cold supplies and the drain, and find out what all leaked. Good times. My heart was racing. I fitted everything -


and turned on the faucets, then watched as the water drained... no leaks!


(The painter's tape is so we don't mar the edges moving it in and out of the bathroom)

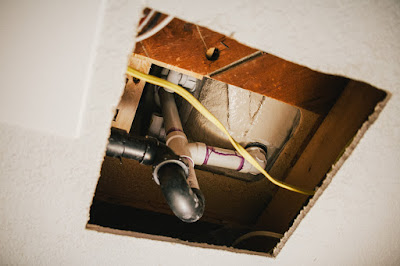
Lastly, an experiment... To change the condenser tubing for the furnace from running out the back of the house where it had been installed to drain with the house plumbing. So I ran a length of 1-1/2" ABS off the drain up into the attic -


In the attic, I pulled the tubing from the back of the house over to this new drain stack and fitted it into the plumbing. Only time will tell if this will drain properly (it's warmer out now so the furnace isn't kicking in and the condenser isn't running as often ). If it doesn't work, I'll just seal off this extra stack and screw the tubing into the outlet at the back of the house. If it does, it'll mean we don't have to worry about it freezing every winter when it gets below 32ºF.

But regardless... the plumbing is finished! Next... clear out the bathroom to install the heated flooring element and then tile the floor before (at last) putting up walls and starting to make this space feel more like an actual room...

Monday, December 19, 2016

time for plumbing.

I hate plumbing.

There, I said it. But it's sort of necessary (and evil, as the saying goes), and so it had to be done. Starting with a good ol' fashioned Cutting Into Our House's Plumbing party. In this case, it was copper supply lines running to the old tub shower. It's good times having water spraying all over, even after having shutoff the main and bled all the faucets in the house (note to self: the faucets outside the house are below even these supply lines in the basement ceiling, so need to be bled, too).


Anyway, these are the new PEX (Sharkbite) 1/2" shutoff valves I installed, and the PEX running up into the new tub/shower cavity. Next up... the valve. Similar to how I did it in the other bathroom, I zipped a 1x6 in half on the table saw after drilling a 2-1/2" hole, threaded the four 1/2" Sharkbite connectors, then clamped it down tight -


K joked when I was threading them about how, with all our fancy advancements, plumbing still requires wrapping threaded pipe ends with teflon tape. I pointed out, however, that this Sharkbite stuff really is a leap forward. Seriously. It's the only thing that makes plumbing bearable.

It wasn't too tough to get the tub and shower stub out installed -


The only tricky part was being pretty exact for the tub because the tub faucet threads onto the 1/2" nipple - and it needs to A) thread as tight as possible so it doesn't leak while B) butting perfectly up against the finished tile. Kohler said to measure 4-1/8" from the end of the nipple to where the finished wall will be. Of course, there is no finished wall - so I had to guesstimate using a scrap of 1x to mimic the 3/4" thickness (1/2" cement board + 1/4" tile). Crossing fingers after the wallboard and tile are installed the faucet fits right because, well, at that point it'll have to fit right.


That said, the shower and valve (once the work of clamping it to the 1x6 was done) were easy. I also glued the PVC drain fitting to the ABS P-trap with a special, slimy, green glue concoction. And yes, I made a special trip to Lowe's and spent $6 to get it - I don't mess with plumbing fittings, and assume that if it's recommended to use this glue for that and that glue for this... I'll do it.

Then the fun part - testing the tub!

So I cleaned it out, installed the overflow drain cover and drain plug -


Then filled 'er up!


Once it was full... turned on the jets! And... nothing. Drat. Went down to the breaker box thinking I may have switched off the breaker. Nope, it was on. Back up to check the outlet. Doh - it was dead. I dunno how the GFCI tripped, but it did. Hopefully that doesn't happen too often, although I'll be installing an access panel in the wall at that end of the tub in order to get at it in case it does. But still, hopefully it doesn't...

Anyway - flipped the GFCI back on and presto... jets!


Oh man. That was the sound of luxury, I'm not gonna lie...

Too bad K discovered a leak in the drain fitting under the tub (we can look up at it to access through the basement ceiling, which is convenient - and will be to fix it). So I'll have to take apart the drain and rethread it all to reseat the rubber seal. Bleh.

But the fun wasn't over... it was time to once again throw a House Plumbing Cutting party, and disassemble the galvanized supplies for the new vanity. Yep, it was wet and messy again - but we got the new PEX supplies fitted and ready to go -


Oops. Despite literally writing on the back of the drywall 'H' and 'C' for 'Hot' and 'Cold'... I still installed blue PEX (indicating cold) on the hot supply, and red on the cold. I'm retarded. It doesn't really matter, but I'll probably fix it cos it'll bug me. Which means shutting off the water and bleeding the lines again - oh well.

What remains then - besides those couple of fixes - is hacking off that cast iron drain pipe running to the vent on the right. I'll cut it off with a sawzall just above the floor joist, slip on a no-hub coupler and run ABS to line up with where the new drain will need to be, and attach it to the existing drain stack (which I'll also need to cut off, and likely run ABS up through the roof flashing - hopefully I'll be able to just stick a new ABS pipe through it without having to mess with it).

It'll look something like this -


And when all said and done... this (the sketch on the lefthand page) -


Onward...

Saturday, December 10, 2016

we have a tub!

After making the classic mistake of ordering (and framing in) the wrong tub, we received the correct one a week ago or so. This is the most important part of the bathroom remodel, so it was time to fix my mistake and get it installed.

I needed to make up 4" in the space we framed for the tub, so between Home Depot and Lowe's, I was able to get what I needed: a stack of 2x2s (1-1/2") and 2x3s (2-1/2"). Today, Scott and I 'scabbed' them onto the framing we installed back in August - 2x3s on the plumbing side...


And 2x2s on the built-in cabinet/shelf side...


Then we dry-fit the tub to make sure it was good -


Boom. It fit. Time to install the drain -


Had to dry-fit the PVC pipe to measure, then cut it to length. Overflow and drain installed to the tub. Now time to take a look at the drain under the subfloor...


I thought I'd actually be able to use the glued section of the P-trap left from the old tub, and just take off the slip joint for the trap and use the new one I had bought. The thing is, apparently in 1980-whenever that slip joint was roughly 1/16" smaller, so... the new one didn't fit. I ended up having to cut off the ABS (slowly, it was a little tight with the saw under the floor between the joists... ) and glue a coupler to the existing pipe, then a short section to line up the trap where the drain would be from the tub. To make it a little easier, I opted to saw an 11" square hole in the basement ceiling (still, why did anyone install sheetrock on the basement ceiling!) to access the drain and make sure it all fit (I'd cover it up with an access panel) -


But it did... all fit, that is. Phwew. Knowing it did, we heaved it back out, then I went to work mixing up the mortar. We first laid 2-mil sheeting on the subfloor, then dumped the mortar onto it and spread it around -


Finally, we lifted the tub into place for (hopefully) the last time (then proceeded to jump up and down inside it to make sure it fit). We had scribed pencil lines on the joists for where the tub flange was before setting it in the mortar, so we'd know where it needed to rest. It all looked good, and was level -


Kohler's instructions were, in typical fashion, really lame. Here, Scott tries to make sense of them...


They mentioned how the motor should rest directly on the subfloor but, uhh, that wasn't actually possible (that plywood it's sitting on is part of the tub base) -


So hopefully that's ok and it isn't going to be terribly noisy. We'll test it before hanging the cement board and sheetrock...

Lastly, we nailed up 1/4" furring strips I had gotten at Lowes -


Only to find out 1/4" (despite that being what the ol' instructions called for) weren't thick enough - the tub flange was thicker than apparently it should have been. So I looked up in the garage and found two full sheets of 1/2" (well, technically 7/16") plywood, then broke out the table saw so we could rip 1-1/2"-wide strips to use for furring. I'll return the cedar ones to Lowe's (they were kind of expensive). Better to be scrappy, afterall - they're just strips of wood that will never be seen.

After we ate homemade pizza for dinner (that's the price we paid for Scott's help heh) and he left, I took a circular saw to the original framing to make room for the built-in cabinet that I'll build this coming week, as well as installed the framing for the built-in shower shelves. I mis-measured one of them (12-1/2" instead of 12-3/4", even though I had clearly written the latter) and mis-cut one of the 2x4s. I thought I was super-clever by using the back of the old vanity for the back of one of the shelves, but I mis-cut it as well and had to redo it.

It was time to be done.

A successful day overall - the framing fixed for the tub, the (correct) tub installed (just need to get the ABS-PVC glue to finish the final fitting), the framing fixed for the built-in cabinet, and the shower stall shelves built. But for some reason it still doesn't feel productive...

Thursday, November 24, 2016

oops.

Yep, oops.

After finishing the framing, then spending an hour or two making sure the new whirlpool tub deck was level, we heaved the beast into the opening, stood back, and examined our work.

It was then that Scott gently asked, 'Maybe I don't see the whole picture here, but what are you going to do about water?'

'What do you mean?'

I had ordered a tub without an apron only because I wanted to build the front paneling myself, like what I did in the back entry. And that meant also building a deck for the tub to rest. Of course, we had no intention of only using this as a bathtub, and so I also ordered a shower faucet for it.

That's where Scott noticed the problem: in the two inches all around the tub that made up the deck (space in this bathroom is tight, so no sprawling tub deck for us). He pictured the water piling up there after every single shower, and he was right. It (obviously) would.


Mother-trucker...

So then... yeah, oops. Well, Home Depot exchanged this tub for the same one, this time with the apron (and lefthand drain). And now we'll have to rip out the deck front framing, as well as do some more creative carpentry - add framing (thankfully only 4") to the inside tub surround walls. It's not the end of the world - just a little setback. But I'm thankful to Scott for noticing before we went any further!

a vanity.

For the bathroom, we needed a vanity. Duh. Just preferably, not something like this (taken at the cute little inn we stayed at in Bar Harbor, ME earlier this month) -


A great example of the classic, pre-fab, Big Box, MDF veneer, totally cheesy vanity. Yeah, so no - not that. A few years back, I blogged about making stuff, not buying new stuff, and fixing stuff. So with this bathroom remodel, we want to reuse as much as possible. And we knew for the vanity we wanted to find an old dresser, desk, something, and turn it into a vanity. So in looking up ideas, I came across an article that said in order to accomplish that, we would need to hire an expert carpenter and a crafty plumber.

Ok, then - time to find out if I fit the bill...

Well, first - to find a piece of furniture that would work. We scrounged for a few months, looking at various used furniture stores in town, Offerup, even Craiglist, until we came across a nice-looking, mid-century modern credenza at a local used furniture place that looked like it would fit the bill -


It seemed perfect, with the two doors on either side and a large drawer on the bottom that could remain intact, and the two drawers in the middle that I could remove to make room for the sink and plumbing. It also fit the space we had perfectly, at 48" in length, 32" high, and 21" deep. And it was nice, a quality piece of furniture built from solid ash, with superb joinery and craftsmanship. Like any savvy antique hunter, we first did a quick search online, and were surprised to find it being sold for $1700. It was marked $400, but the guy even knocked a hundred bucks off when we mentioned not needing the hutch that was included. Sold!

Time to take it home and get to work...


Also, in keeping with that M.O. I mentioned earlier about reusing, we found a nice, undermount Kohler sink at the local architectural salvage yard for $60 - so I was determined to make it work, even if it meant having to do some creative carpentry...

First things first - size this thing up for real -


Then start cutting. Oh boy, it was such a nice piece of furniture I felt bad taking a jigsaw, and drill, and crow bar to it. Really, really bad. But it had to be done -


Ouch! Now there was no going back... I even loved the classic, flathead screws!


With the holes for the Kohler widespread sink drilled, the back cut out for the plumbing, and the drawers removed along with some of the joinery to make way for the sink - it was time to measure and make the cutout for it.


I'd first drill, then use a jigsaw to make a rough opening -


Of course, since this was an undermount sink, the opening couldn't just be rough - it had to be perfect. Yikes. So for that, I'd use a router and the template from when I built the router table. Well, the corner of the template anyway. Since it wasn't the right size, it meant taping it down and moving it for each corner. All in all, between that and feeling the pressure of needing to make sure the opening was perfect, it took about two hours to accomplish.


Thankfully, it actually turned out as close to perfection as I could have hoped -


Sweet, plumbing openings done. Then it was time to work on refinishing... I did some research and determined that Zar stripper was the one most-often recommended, so I bought a quart of it and got to work. Indeed, it did a miracle job with the existing finish!


(A test scrap - the piece I cutout for the sink - showing the existing finish on the left and the stripped, then sanded, clean ash on the right... )


Dang - stripped down to bare wood and sanded, this piece looked awfully nice...


But I knew I wanted to stain it darker to contrast with the flooring, grey walls, and white tile so... onward! Well, first - a few more instances of creative carpentry were necessary to make the sink fit. I had to gently pry the front top piece off in order to route it to make room for the drain bulge in the sink -


Reattach, countersink some new screws to hold it in place, then test the sink fit -


Boom. Time to stain... I used a mixture of the two gel stains I got (a brown and a red) for the fan base I built a couple of years ago, in this case 3:1 brown to red. And let me just mention, I love staining. Actually, I love putting on the poly after staining. But either way, finishing a beautiful piece of wood or furniture is so rewarding. Sort of like painting a room - instant gratification.


I swear by the Minwax oil-based satin poly, which I used on the door/drawer fronts, and cabinet legs and sides. But for the top - given the fact this is a vanity countertop - I'd need to find something a little more durable, and waterproof. After more research, it sounded like Waterlox was the way to go. So I ordered a quart of that and got to work... again. Three coats of it, for now. Maybe more in time. It'll be a test to see how a wood vanity top will hold up...

The last bit of creative carpentry I had to do was figure out what to do with the drawer fronts. I first considered hinging them, but that seemed like a) it would be challenging (not that I'm up for a challenge - pretty much this entire project of finding and converting a piece of furniture into another piece of furniture has been one, fun challenge!) and b) the hinges would be visible. So, thinking more how we wouldn't access under the sink all that much (there isn't much room), I opted for a simpler option: just use cabinet door magnets.

But first I had to make the false-front doors, which I did by repurposing one of the drawer bottoms from the drawers I tore apart -


I just glued the drawer fronts to that, then drilled holes for the cabinet handle screws and installed them -


As well as attached the magnets inside the cabinet -


Oh, but wait - there's more! I then realized I also needed to route out a section on the inside of the fake drawer fronts for that bulge in the sink drain -


At long last... it was time to attach the sink, faucet, and trap in order to get it ready to intall in the bathroom (oh, there's a complete overhaul of the plumbing needed in the bathroom to re-align the drain and supply lines for this new vanity - yay!). With a combination of silicone and plumber's putty, I had the sink and faucet installed. Then I had to take a hacksaw to the drain that came with the faucet in order to fit the trap in the limited space left where the two drawers once were. But a couple hours later and it... was... finished!


Now granted, this was taken crammed in J's bedroom between his computer desk and bed, but it's really a pretty beautiful piece of furniture now. We'll each get a side door to call our own, and the large drawer can hold extra towels and such. K came up with the brilliant idea to go with a dark grey ceramic tile floor that would contrast beautifully with the warm wood. And I'll be staining the inside shelves and sides to match the vanity for the built-in cabinet I'm designing and will install to the right of the bathtub.

Vanity cabinet - 1960s mid-century modern credenza from local used furniture dealer
Sink - used Kohler sink from local architectural salvage yard
Faucet - used Kohler faucet found on Amazon
Hardware - new from Rejuvenation

Time spent: I have no idea. Weeks. Lots of things learned. Thankfully, few mistakes made (the one glaring one is I centered the holes for the faucet spout and handles - only to realize the spout doesn't sit centered (because of the drain lift rod), so it's shifted back a little from the handles... oh well). But it was totally worth it.

Oh, and K had found a really solid, heavy, HUGE mirror (she's tired of the tiny one I installed in the other bathroom and made sure for this one she gets a big mirror!) at the new Habitat For Humanity store in town, so we bought that for $30 and I refinished it to also match the vanity -


Next... the plumbing overhaul to make this thing be actually, well, usable...