Showing posts with label knockoffwood. Show all posts

Monday, June 7, 2010

bed part six.

Finishing (part two) and final construction ...

So it was time to finish this thing already. Let's see ... I started it about two months ago so yeah, time to finish. I just had to put on the last coats of varnish (I put on a total of three) and then I could start putting it all together.

I used a satin varnish from the same company that made the stain - making sure to pour the varnish I was using into a separate container as I worked cos it would get slightly contaminated with the stain and this kept the rest of the varnish in the can pristine -

Once it had a chance to dry, I glued the posts to the headboard and footboard using some clamps -

Then screwed in the pocket hole screws for good measure -

Those didn't really matter because the headboard and footboard construction is all just cosmetic - no structural anything about them. But whatever.

Then a couple days later I got to putting the whole thing together - it took maybe an hour or so and then it was done.
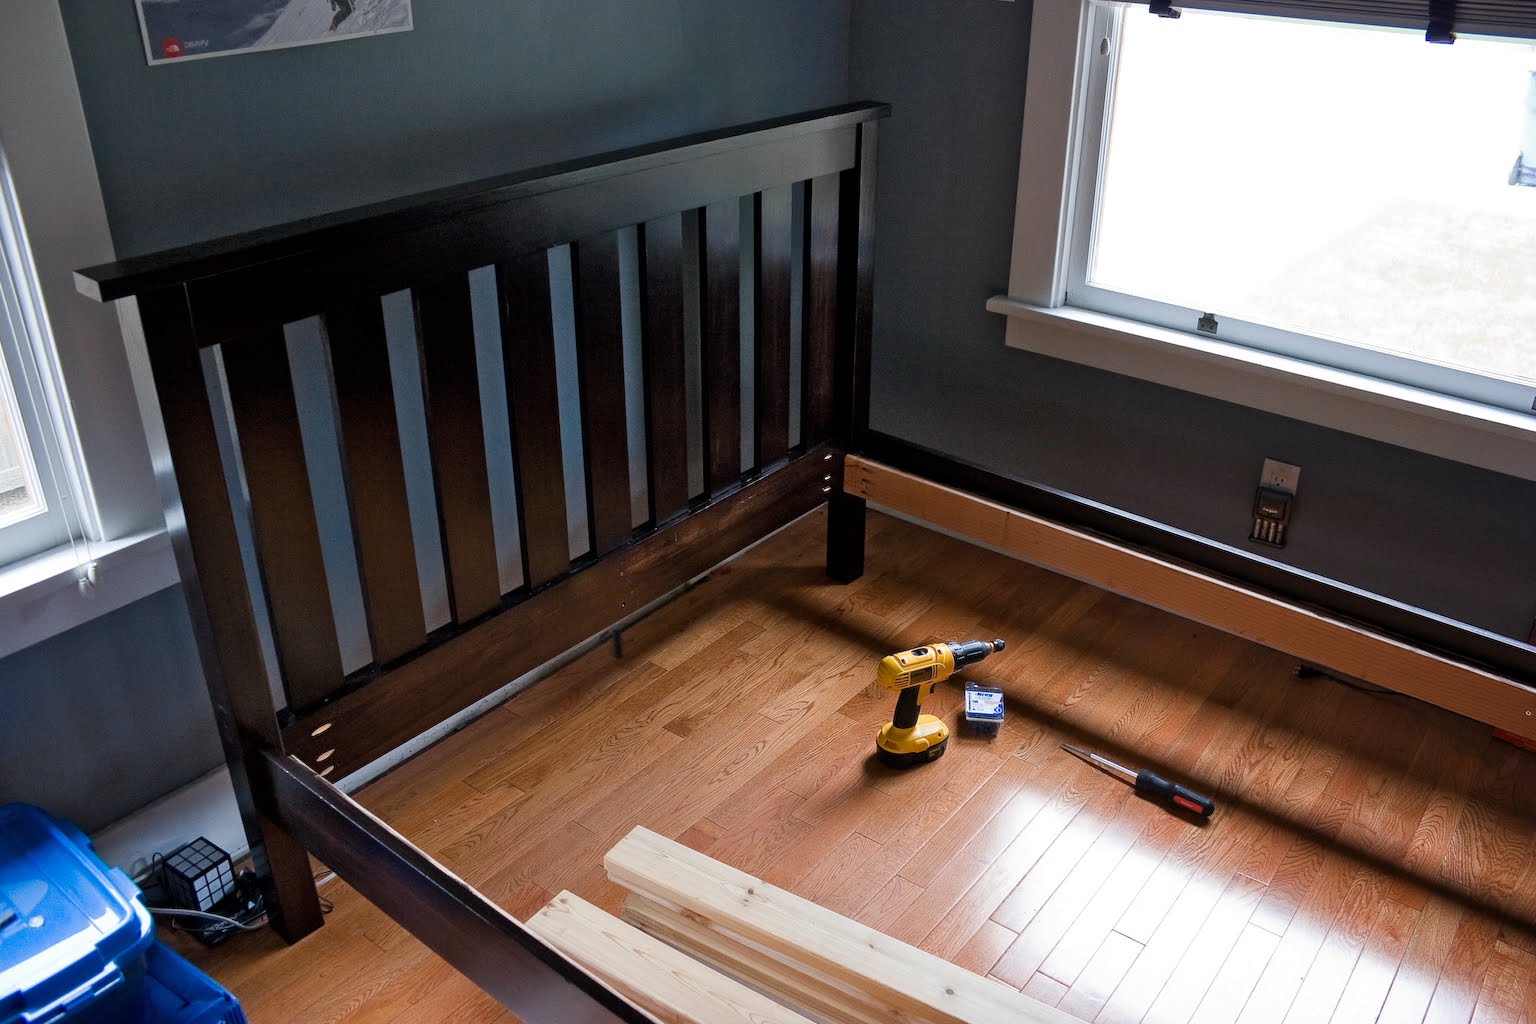
To attach the siderails I cut a 2x4 into two pieces each to the height of the base of the headboard and footboard off the floor (which were the same) and then drilled in the three pocket hole screws on each end. I am still impressed with how strong three pocket hole screws can be - I think I read somewhere on the Kreg site that the strength of a pocket hole joint is somewhere around 700 pounds! The self-tapping screws are sort of the secret and they apparently exert an enormous amount of clamping pressure (compared to about 450 pounds of a mortise and tenon joint). Yeah, with three screws per post this bed is absolutely rock solid.

The rather unfortunate thing was I was stupid for the last step and cut all the 2x4x10s I had gotten for the horizontal mattress supports too short. I had neglected to take into account that the siderails were indented (on purpose of course) out from the inside edge of the posts. I had cut them all to exactly 54-1/2" (the width of the headboard and footboard) not taking into account the 3/4" offset so they were all 1-1/2" too short. Oh well. It turned out OK cos I'll use those for the porch railings and when I went to Home Depot to get more lumber I found some awesome cedar 5/4x10' stuff so the bed now smells like cedar and they look much, much nicer than the 2x4s (and were only something like fifty cents more per 10' length) -

Two screws per board to add rigidity to a bed that - with the pocket hole screws and a lot of glue - was already rock solid but now even more so -

And that was that. I had gone to Sleep Country on Memorial Day to get a mattress and was reminded of how random mattress shopping is. Like in the fact that, well, I had gone to Sears first and thought I'd at least check out another place so headed over to Sleep Country (where I bought my mattress). After being almost attacked by a salesperson it became clear that all they really had in the full size were total crap mattresses that would probably fall apart in two years and then 'luxury' mattresses that didn't seem to really fit for a ten year old. But I eyed one that I really liked even though it was about two hundred dollars more than what I surmised was a comparable mattress at Sears. So I told the salesperson this and she nearly-instantly said she could not only match the price I spewed out with absolutely no proof (it was the truth of course) but that she could beat it by 5%. Sold! And it really is a nice mattress - my goal being that Julian will take it with him when he moves out (along with the bed) cos both will have stood the test of time. Well, that was the goal anyway.

Some organic sheets from Target (which are really actually super-soft and were cheap) and a quilt that I found at a random garage sale when I was back in Missouri a few weeks ago that Kathy was kind enough to mail rounded it all out. Then Julian had to try it out -

The next step is to totally super-duper clean his room (and take the quilt to the laundromat's ginormous washers) and then I'll try to take a real photo of it to post to the knockoffwood bragging wall.

Overall it turned out looking really pretty good. I learned a few things along the way that I'll put to good use in future (yes, future) woodworking projects which of course includes building my dream canopy king-size bed.

Monday, May 10, 2010

bed part five.

Finishing (part one) ...

Well, with a solid weekend of gorgeous weather forecast I knew I would have to get on both coats of stain I intended. The first step was of course to put on a wood conditioner. I talked to the Stain Guy at Rockler last week and he hooked me up with Zinsser Seal Coat to serve the purpose - worked great (not sure what's up with the dude who left the 1-star review on Amazon). Although I should say finishing is not my forté. The last thing I think I stained was my entertainment cabinet I got at Ikea and one day decided to strip and refinish with a really dark stain. It turned out OK, but that was probably five or six years ago.

So anyway with my lack of experience understood I went to work applying the Seal Coat -

The one thing I learned was to not let it be applied unevenly as it will then show through the stain you subsequently apply. Seems obvious, but it just requires constant attention to make sure it's not dripping along the underside of an edge or something while you're applying. I used an old brush to put it on, then sanded it down with the lightest abrasive pad Rockler had (another suggestion by the Stain Guy).

After letting it dry for half an hour or so, I was able to start staining. Ooh boy. I was really nervous about this part I must admit mostly because of all the money, effort and time I had spent up until this point to make the bed as nice as possible. And I could very likely completely ruin it at this stage. I guess I could paint it, but then I would have spent all that extra money on nice clear, knot-free pine and VG fir for nothing. And I wanted it stained, not painted. So hopefully it would work.

I had picked out General Finishes espresso water-based stain cos it was the shade I wanted - a really deep, dark brown -


I used a foam brush (before Katie took over) to apply (it was really thick - almost like what I would expect a gel to be like) and wiped it off with a t-shirt. Well, started using just a t-shirt and my hand but did not like how uneven it was coming off. So I grabbed a mitered 2x4 I had and an old sanding sponge, then wrapped it with the t-shirt. The mitered 2x4 was a good angle to work at and the sponge helped even out the pressure I had to apply. Definitely helped.

The posts and siderails went pretty fast. The headboard and footboard took much, much longer -

I realized pretty quickly after starting them that I should have pre-stained the vertical slats and the edges of the pieces that filled the gaps in between them. That would have made it look much better (I assume), but I was hoping a second coat of stain would a) darken it slightly (although it was about as dark as I wanted) and more importantly b) hide the imperfections of the first coat.

Once I am all finished with the bed completely I am going to compile a list of things I learned (since this was just the practice bed, afterall) so that I don't make the same mistakes again on the next bed I build since even with the frustrations of staining and finishing I am still enjoying the process. Maybe because I am learning everything and figuring stuff out and solving problems as I go which is always good.

Next step - 2-5 coats of varnish.

Thursday, May 6, 2010

bed part four.

Joinery (sort of continued) ...

OK, so over the last couple of weeks I have been struggling with how to join the siderails to the posts for this design (and even the headboard and footboard although I partially solved the problem with using the biscuits I routed). The requirement still: no screws can show anywhere on the bed.

So I had gotten some brackets from Rockler Woodworking up here along with a burly hangar bolt and wood screws. Then I thought I'd make my own from 2x4's and use tee-nuts and such. Still, nothing seemed to quite work. And to give an idea of how many options I tried - when I went to return the various brackets and hardware I didn't use it added up to about $50.

But then I hit gold with the idea of using pocket hole screws. I had to go out and get a $20 Kreg jig but I was hoping it would work. It has to be super-duper burly and strong since all the weight of the rails and 2x4 horizontal mattress supports, mattress and, well, my son will rest on these joints. I didn't want it to fall apart one night while he was fast asleep ...

So I tested this out last night with my little mock setup of the headboard/post/siderail I had made to test all my different ideas before doing the real deal -

And wow with only two screws (2-1/2") this joint was strong! I assume it's because you only drill partway in - then the screws that Kreg makes are self-tapping which really embeds them tight in the wood. I'm going to beef it up though and put in three screws for each end on the actual rails just to be safe.

This setup meant I had to cut off a smidge more from each end of the siderails where I had notched them in order for the screws to work (which meant holding each 6' rail upright and slide it along my table saw - good times - then chip the remaining wood away with a chisel like I had originally done when I routed them) but I have both rails done and now I just need to drill the holes for the inside of the headboard and footboard (just the lowest section that attaches - the top section I'll let go with just being glued using the biscuit joint.

Strong. And no screws showing. Perfect.

This is a lot of fun building I must say!

Monday, April 19, 2010

bed part three.

Further assembling ...

This weekend - much to do (besides bed building). But Sunday afternoon, after lots of weeding, I was able to finally get back to it. Had to do some routing to fit the biscuit joints for the posts and headboard and footboard. On Saturday I got some new bits along with an adjustable guide that just happened to fit my garage-sale router from a few years back. Both the new bit (the one that came with the router burnt the wood) and the guide were priceless - particularly, the guide. So routing out the holes on the posts was pretty easy, but I had to figure out a way to route the ends of the headboard and footboard.

What I ended up doing was to lay down a 2x4 on the garage floor to rest the headboard, then clamped it to my workbench.

Then just took the router along it after drilling with a 1/4" bit (since my router is not a plunge-type).


And wallah - was able to insert a 1/4" biscuit (just some window stop trim I picked up at the Depot) -

So the final joint when assembled looks like this -

No screws. And when glued I think it will be pretty strong. Now I just need to do the same thing for the two siderails so they can fit into the posts as well.

Wednesday, April 14, 2010

bed part two.

Cutting and start assembling ...

So first things first - carefully read the plans again along with all the additional notes I had made with my changes and then start cutting into the pile of lumber in my garage. This took probably a little over an hour or so and then I had lots of smaller stacks of lumber in my garage -

Really, it only took that long because of a little tip I came across (coincidentally) reading a TOH article online just the other week: install a blocker when cutting multiple pieces of wood the same length like this -

That way, when cutting you can just shove them up against it and cut - identical length, every time. No measuring. Like in the photo above - for the spacers along the tops and bottoms of the headboard and footboard. I also used it for the vertical slats. Worked awesome.

Then I had to figure out how to notch the 2x4s (one of my modifications) so they would bring the siderails out a bit further on the posts. Hmm, what about routing it? I asked myself. So I broke out the router I bought at a garage sale in Tacoma a couple years ago along with a router table I also got at a garage sale to see if it would work.

It worked perfectly - I routed across the 2x4 about 3/4" deep and 3/8" from the edge, using a speed square as a guide. Then just used a chisel to perfectly cut away the notch on the end to complete it. I have to say, sometimes I totally surprise myself - in that this actually worked and fit the length of the 1x6" board I cut perfectly.

And the final result then looks something like this -

Instead of the 1x6 siderail coming to the inside edge of the post.

OK, after patting myself on the back for that little success it was time to begin assembling the headboard and footboard. My goal is to not have to cover up any screw holes (or even nails) so I am using just glue to piece together the headboard and footboard. So first I had to lay it out -

Using a 2x4 as a post to butt the left side up against, and what would be the toprail to butt the top pieces up against, I went to work.

Then I had to glue. And clamp. Luckily the glue said it set in thirty minutes, cos with only four clamps I could only do one side at a time (and the headboard and footboard each took four turns of glueing). Of course a couple days after doing this I was at a local woodworking shop and found a score on four more clamps so I'll be able to work twice as fast glueing from now on. Sweet. Really, it is.

So once all the glue was dry both of them seemed really quite solid. The trouble was, hmm, how to attach them to the posts without using screws. Then it hit me (and again - totally nothing the plan from knockoffwood mentioned). Since I was so successful with the router earlier, I thought - what if I routed out the top of the post on the inside and used a piece of 1x4/1x6 (top/bottom of each) that stuck out longer than the 1/2x4/1x2x6 pieces and basically create a mortise and tenon joint? Duh!

Except ... this idea came to me after all the glue had set, and now I'm not sure if I'll be able to take out the little pieces I put on each end. If not, I can route out a smaller section and use a biscuit joint so I'm not too worried. And yeah - either one will mean no screws!

So next step - sanding and rough assembly. I really am having a blast building this, and I think perhaps that furniture building may become a bit of a habit. Until something goes horribly wrong, of course ...

Sunday, April 4, 2010

bed part one.

So here is part one of testing the plans from knockoffwood to build J a new bed ... lumber.

Phwew. I haven't added it up exactly but I think after all was said and done I spent close to $300 in lumber. Bear in mind the bed is $700. So now I have probably close to six hours minimum invested in it just reviewing the plans, picking out lumber at Lowe's, a trip to Tacoma to Gray's Lumber for the harder-to-find stuff and back to Lowe's to return the stuff I got but am not using due to my altering of the plans.

Which are:
  • She had the top and bottom rails of the headboard and footboard the same (6"), but I noticed on the Land of Nod bed they are not - so I am going with 4" stock for the top rail and 6" stock for the bottom rail of both
  • She had 1x stuff for everything - it makes sense cos it's cheap and easy to find in lots of dimensions (unless you're using harder-to-find or more exotic woods than most of the soft woods and oak or poplar). But I realized that would make the headboard and footboards 2-1/4" deep whereas the siderails were only 3/4". Unacceptable. Also, I thought varying the depths of the wood used for the headboard/footboard would look more aesthetic so I got 1/2" stock for those 4" and 6" top and bottom rails
  • She used 4x4" posts for the bed which are hard enough to find. But still after probably half an hour spent combing the pallet of fir 4x4s at Lowe's, I opted going for the much more expensive 3x3 CVG (clear vertical grain) fir posts that Gray's lumber had (@ $3.40-something a foot!) - thankfully I only needed 12'
  • She used 2x4s for the crown on the headboard and footboard which to me seems somewhat ghetto - so for relatively cheap I substituted 5/4 CVG fir (only 98¢ a foot) - got 5/4x3 stock to match the 3x3 posts
So wow - a few modifications but I am hoping they will make the bed look a little more classy and not so much the yeah-I-got-a-bunch-of-cheap-lumber-and-threw-together-a-bed sort of look.

Next step: cutting.