Monday, August 29, 2011

some more garage.

Yeah - this will take some time - hanging all the trim. I've got it started, but before I could I had to paint. And before I got to paint I had to scrape. And prime. So last week during the evenings (cos I've been out backpacking or climbing every weekend) I got to work. After lots of scraping - but not nearly as much scraping as the house - I was ready to prime. Using a roller this time - instead of a 2" brush like I did on the house siding last August - I accomplished the priming pretty quickly and the garage was ready to roll -

So the next day it was time ... time to paint. Off I went gathering all the stuff (mostly from last year except for a new gallon of the Benjamin Moore Brilliant White and a quart of the Sandy Hook Green - I was hoping what I had left of the dark green would last - which thankfully it did) -

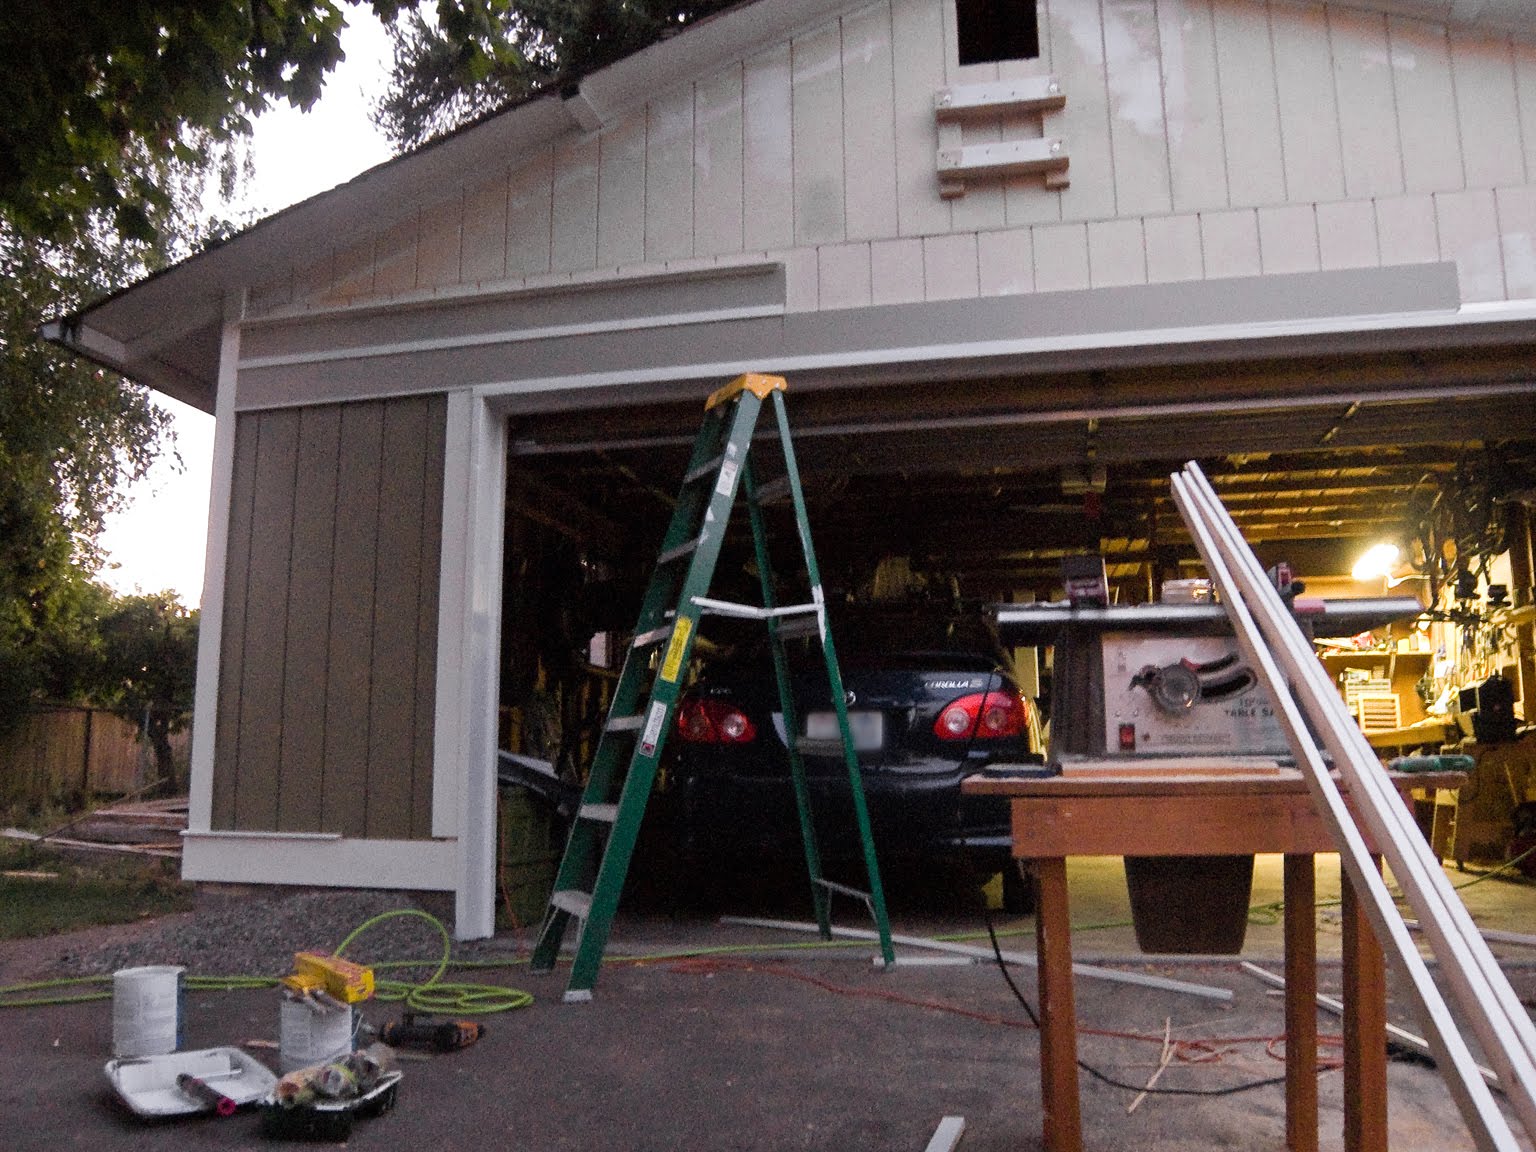
And - just for fun - umm, I had to take a pic like the one I took last year before I started painting -

It went pretty quick. The most tedious part was shoving paint in all the vertical grooves of the crap plywood siding. But I am now choosing my battles - and finding siding like the beautiful 2" VG fir stuff on the house is no longer an option (at one point I was aiming to do that - along with tearing off the roof and raising it from a 20º to 34º pitch to match the house - yeah ... no longer) - I hope that just being the same colour with the same trim design as the house will help. So after two hours the garage was green where it needed to be green (oh, and white where it needed to be white) -

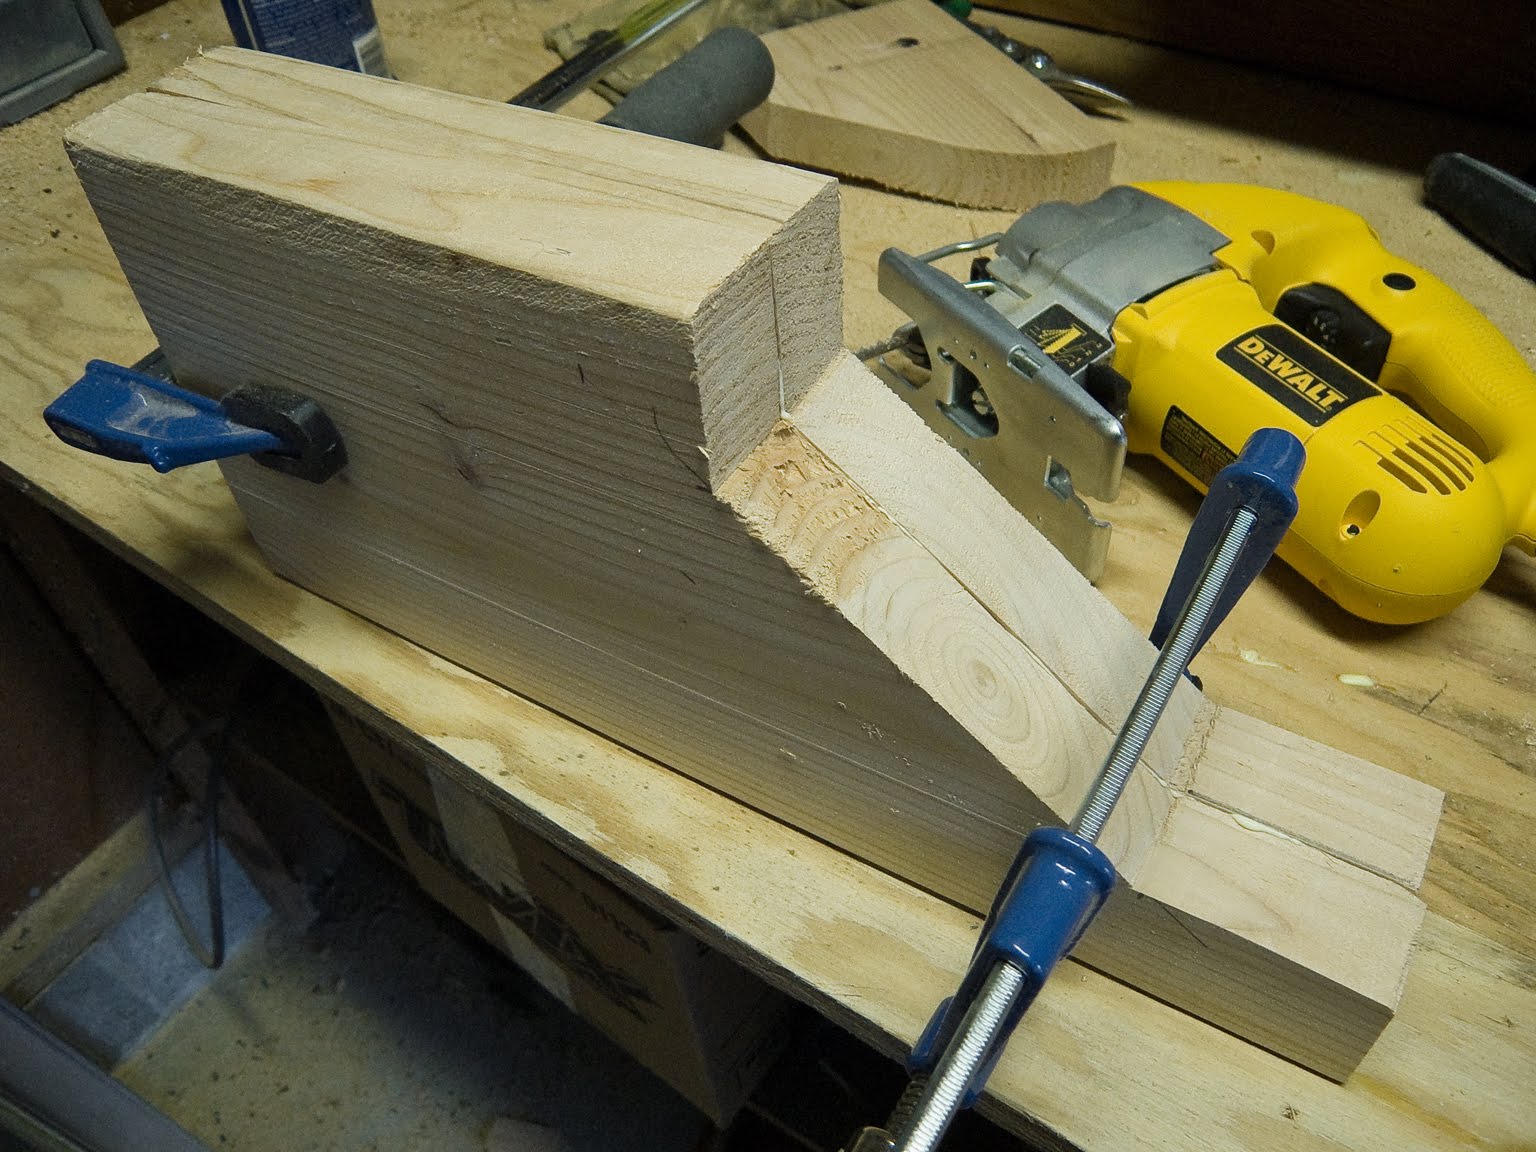
Then ... then it was time to start hanging some trim. This is where it'll get tricky ... and time-consuming. Probably because I'm no carpenter. And on projects like this it becomes painfully obvious. A last-minute idea was to also put some 1x8 trim coupled with a 1x2 drip edge all around the bottom of the siding like on the house. In order to make the drip edge I measured the angle of the piece around the house (10º) and set the table saw blade at that angle and ran each 8' piece through -

Then sanded down the cut some -

Katie primed them and the 1x8s while I got to work starting to - well - actually hang some trim. The first pieces to go on after stapling a section of the 1x8/drip cap border were some vertical 1x6s I had ripped down to 1x5s -

After getting them up, I was able to start piecing together all the pieces that would make up the horizontal trim above the garage door -

To attach the 1x2 I had planed and ripped down I used my trusty stapler before nailing it to the siding -

Katie got - umm - some choice shots of me working -

Then it came time to piece together the trim for the top - made up of a 1x8, 1x2 and 11/16 half-round -

So then ... after another couple of hours I was slowly making some progress -

It's slow work I'm realizing and will take longer than I probably expected but it's all good. At least it's moving forward and I haven't (yet) screwed anything up. But now we have to go to Missouri for five days so I'll have to take a break and hopefully finish it up in September ... still lots to cut/fit/staple and also hang all the cedar shake. And then the lighting, new people door (to mortise and hang) and possibly a new garage door etc. etc. ...

Hopefully it'll be an improvement over the old garage and look more like the house ...

Wednesday, August 24, 2011

garage continued.

I've been trying to piece together prepping the garage in between seemingly a dozen other things. Luckily this project will not be nearly as ginormous as painting my entire house this time last year. But like coming back from a backpacking trip this weekend Sunday evening to get hold of the paint scraper and pressure washer and scrape and wash the siding and under the eaves of the two sides I'm prepping to paint. And Katie had been a dear - when I opened the garage on our return I saw spread out on the floor all the trim primed and everything.

But before she could prime them I had to do some prep work one evening last week. Like set up wood shop in my driveway -

Then do some cutting, planing and routing. I consulted my diagram and other notes for what it was I was supposed to do. Like take three 1x2s to the table saw to rip them down to just an inch wide which would let them stick out from beneath a 1x8 above by just a quarter inch (instead of three-quarters of an inch) -

Then pretty much plane down just about everything at least a little - and some more than a little -

Having a planer is spectacular. It's like sanding - only a hundred times faster. And it made it possible to take a three-quarter-inch-thick 1x2 (the same 1x2s I ripped to an inch wide) and plane them down to a half-inch thick. And of course just get all the muck off lumber by sending it through the planer once on each side.

But then something a bit more challenging to do ... cutting out the architectural beams I was building to match the three on the front porch gable. I luckily got the idea to use two 2x8s after realizing I didn't have a saw that could make the necessary cut through a 4x piece of lumber. So I traced the outline of one above the porch and got to work -

Got to use my new (well, refurbed) jigsaw. Holy cow. All this time I had been using my classic five-dollar-garage-sale-circa-nineteen-seventy-six B&D jigsaw (complete with the old B&D logo). This Dewalt blew it away the moment I turned it on. Smooth. But still - I tend to like to have things pretty precise so I clamped my speed square to the 2x8 as a guide -

Then used a long straightedge to cut the diagonal line -

to wind up with this -


The trouble was - I had to do that five more times. And then piece pairs of them together -

And of course they didn't line up perfectly. But I wasn't sweating it - my plan was to use wood filler to fill in the differences, then sand them and make it appear as if each beam was made out of one piece of lumber instead of two -


And then time to prime and paint them. I'll get to that later - instead, now time to do some other work. Like tear out the beautiful light above the door -

and the other one - plus the spectacular galvanized metal vent - in the gable -


While at Mclendons the other day getting a gallon of the Benjamin Moore Brilliant White and a quart of the Sandy Hook Green, I asked if they had a 12x12-inch cedar gable vent. Well, they didn't - but the guy asked me if I was a carpenter. I sort of shrugged and told him I was a hack-of-a-carpenter. I guess that was acceptable though cos he suggested I just buy some clear cedar and build my own. I liked the idea - so picked up a 1x4 and a 1x3 and a piece of screening material and tonight spent an hour hacking a gable vent together. First I built the box out of the 1x4 -

Then, to figure out the spacing of the slats I wanted a calculator - and realized a garage-sale-find tape measure sitting on the pegboard in front of me had a calculator on it!

How handy that ol' Calcu-Tape ... I knew there was a reason I paid a quarter for it! So with the measurements all figured out, I just had to jot down some lines on the frame -


(uhh, photo courtesy of Katie)

Then grab the router with the chamfer bit I got for the porch railings to create a molding for around the edge - oh and rip the 1x3 down to a 1x2 (instead of, well, buying a 1x2 - in addition to planers, table saws are awesome - should've bought that new-looking Ryobi I saw at a garage sale a couple months ago for $40 ... ) -

The stapler came in super-handy to put it all together -

Then tack the screen to the back -

And wallah - a cedar gable vent -

I'll stain it when I do the shakes after they're hung. Meanwhile - Katie painted some stuff while I had busied myself with all of that -


Her layering up the pieces of wood was pure genius!

---

And that's where I'm at - all the trim is primed and painted. The siding is scraped, pressure washed and all holes filled. Basically the next step is to prime the siding and under the eaves then slap on the Benjamin Moore Sussex Green. Once that is done - it's just a matter of installing a lot of trim and the cedar shake - which will be much faster with the awesome stapler I got last year after finishing the cedar on the house.

Phwew. I love working on the house on warm summer evenings after a day spent working in a stuffy office. A quick snack after getting home - then a few hours of work til dark or past dark - and a light supper and relaxing night. Good times. Good times for sure.

Monday, August 22, 2011


Have nothing in your house which you do not know to be useful or believe to be beautiful.


~ William Morris

Thursday, August 18, 2011

garage door.

Hmm, let's see. For the past five years of owning this house, I have clicked the garage door shut ... then waited twenty seconds or however long it took for it to drop all the way down and - wait for it - perfectly timed it to click the button again when it hit the ground to stop it. You know, to keep it from popping back up. Yep ... five years.

I looked at it probably four-and-a-half years ago - apparently not very hard cos I gave up and just disconnected the lead traveling to the far end of the rail (attached to the sensor that's supposed to stop it when it hits the pavement) cos for some reason it didn't work when that lead was attached.

But today ... after some prodding from Katie on the trainride home and her coming out to look at it while I busied myself testing out the planer (it works great - I'm excited to get to work on the garage trim) - we took a closer look.

It didn't take long for me to see that there was a small piece of metal that was the culprit. The way it works for those not well-versed in the operation of electric garage door mechanisms is the door travels down the rail and trips a little lever that in turn is supposed to push that piece of metal up so it makes an electrical connection - apparently telling the motor to stop. Well - all these years - it turns out the problem was (wait for it ... ) - that piece of metal was bent so it was constantly making that connection. Hence - the reason the door wouldn't go back up if the lead was connected (cos it was sending a 'stop' signal to the motor).

So I simply unbent the metal and wallah - it works! It totally works! Now I'll just have to get used to the fact that I no longer have to wait for it to get to the bottom to press the button again. And in hindsight - it was an incredibly easy fix that for whatever reason I completely missed figuring out four-and-a-half years ago.

ps - all the trim, the 2x4 rakes under the gable and the b-ball hoop are ripped off or down. I need to get a 12x12" square cedar gable vent to replace the crap metal one in there now and another porch light from Rejuvenation (or possibly three - one by the people door and two - one on either side of the garage door).

Thursday, August 11, 2011

garage time.

It's been tough with all the getting out. Which is not necessarily a bad thing. But I have a garage to do this month and literally every weekend is being spent in the mountains. Summer is short here in the Pacific Northwest. Even shorter this year it seems. Has it even really started? Regardless - before I know it autumn will be here for real. Maybe next week.

So ... in the meantime I have a garage to do. Cos maybe after it's done I'll get to do the back patio. But probably not cos it'll get too cold so I'll get to work finishing the low-voltage wiring and drywall and painting in my bedroom instead.

And anyway - well I spent a little time with a tape measure today measuring for trim. The plan is to make the box-of-a-garage look at least a little more like the house. I remember way back when I had the thought of ripping off the roof and redoing it to match the pitch of the house. Well, that's what I would have done had I built the thing. But yeah - not really going to do that since I, well, didn't. Instead - it'll be in the details hopefully that it'll end up looking like it and the house are sort of a pair.

And the details are - well - mostly trim. Here's the fancy sketch I put together today (complete with crayons!) -

The basic idea is to match the trim above the front porch so that looking at the garage behind the house it'll - like I said - look like it goes together. Breaking down how trim is done is sort of fun. Like for the drip cap it's basically a 1x2 combined with a piece of cove molding on the underside. And so on.

But it's usually pretty simple - as in just dimensional stuff. One-by this and two-by that with some ornamental pieces (like the cove) thrown in to keep things interesting. Maybe half an hour later I was done. And an hour combing through the lumber yard at the local Home Depot had me filling Stuart up with 1x8s, 2x8s, 1x6s, 1x2s and the like.

A while ago I snagged a planer for fifty bucks - going to put it to use now. Trevor's got my beautiful chop saw but he'll be wrapped with it in the next couple of days. And I'm going climbing (of course) this weekend anyway. But there'll be some carpentry I'll have to attempt before I'm ready to plug in my compressor and hook my stapler to my belt to bang these things up ... planing some of the one-by stuff from three-quarters thickness to half an inch. Ripping some 1x2s down from an inch-and-a-half wide to just an inch to keep them from sticking out too far. Routing some 1x2s so they fit in between two horizontal 2x8s but still protrude out from them. I have to glue two 2x8s to make the three architectural beams that stick out like on the front of the house - probably plane them a bit first on the side to be glued before cutting out the notched shape with a circ saw (glueing two 2x boards together cos I don't have a way to cleanly cut the notch shape in a 4x piece of lumber - I thought it was rather ingenious when the idea - or more like realization - hit me in the aisle at Homie-D). Going to tear down the 2x4 rakes on the garage gable and replace them with beefier 2x8s (they're pretty decrepit and the paint is all peeling off them anyway) - and have to notch them for the architectural beams. Tear down the 1x4 corner trim on the three corners of the garage I can see and replace with 1x6s to match the house. And of course hang cedar shake in the gable just like I did above the porch.

It'll be fun.

And with all the carpentry work that I'll have to attempt I realize there won't be much painting to do. Especially since I'm - uhh - only doing the two sides I can see. The two sides that face the neighbors' fences I'm not going to touch ... I never see them so why bother? Yeah - makes sense to me.

So anyway - going to get to work over the next few weeks starting with the planing and such before I can roll on primer and then hang them. I actually really like doing carpentry even if I'm a total hack at it. There won't be much scraping to do cos most of the chipped paint is on trim that I'm tearing off - haha. I should have enough of the Sussex Green left from last year to paint the two sides of the garage, but I'll probably have to pick up a quart of the Sandy Hook Green (the lighter stuff) and maybe another gallon of the Brilliant White.

And after it's all finished hopefully it'll look like it sort of matches the house. Just what to do then about the garage door ... oh, and lights ... but I'll get to that.