Showing posts with label lighting. Show all posts

Sunday, August 14, 2016

garage lighting [part two].

So after wiring the garage sale florescent lights a few weeks ago, I wired the outside garage sale lights today. It all started three years ago, during our annual island garage sale extravaganza, where we hop on bikes, attach panniers and a bike trailer (coincidentally, found at a garage sale), and whiz past all the suckers in cars to see what we can score at the hundreds of houses having sales. It's usually pretty random...


Here, K bikes (and carries her messenger bag) with J up ahead... the lights I ended up installing today can be seen in the trailer, along with a pair of skis (J only used once), a porch blanket, and various other things (according to the photos, we also ended up finding an 18" square marble baking slab for K, some recessed light cans for me, and various other useful things).

Being garage sale lights (I think they were a buck or two a piece), they required some touching up with spray paint in order to match the (uhh, much pricier) Rejuvenation lights for the front porch and back door that I bought years ago.

The before -


And then after (with a coat of white paint inside, and flat black on the outside - Rejuvenation's 'oil-rubbed bronze' looks more black than anything - and I had all the spray paint in various leftover quantities in the garage so it only took half an hour or so) -


The wiring part was actually pretty easy. I pulled some existing wires to tidy up, but basically all I had to do was redo the splice (and stuff the mess in a real box with a cover on it) after running cable to where each of the three lights would be installed -


(I put the cover on after I finished the splice)

Then cut three holes in the garage -


(I have a handy template for circular fixture boxes)


(photo by K)

Then pull the wires through and splice them -


(photo by K)

Then just connect the three fixtures -


Turn the circuit back on, cross fingers, and... flip the switch by the back door...


Success! And for fun the back door light for comparison -


Yeah, it's nicer and more 'Arts & Craftsy' but... cost about three hundred times more, so these will do nicely for the garage. Afterall, it's nice just having light out there with the flick of a switch by the back door.


Actually, they're almost too bright, so I may replace them with 40W white bulbs (I got 65W clear ones). But anyway, light...

Sunday, July 10, 2016

garage lighting [part one].

I guess after ten years of having a bare light bulb hanging up in the center of the garage and barely being able to see anything in there at night, it was time to amp up the lighting. Randomly, on our traditional Memorial Day camping trip to Salmon La Sac, we passed through the ol' town of Ronald and - lo and behold - off the side of the road some dude was having a yard sale and selling four fluorescent light banks. He had $15 marked on each, but all I had was $40 so I bargained him down to that much for all four. Boom.

After spending the better part of an afternoon a few weeks ago diagraming the garage circuits, I figured out what I had to do. I seriously don't know how electricians work... I've been as bewildered about wiring circuits in my house as I was about this one in the garage. Whoever wired it up decided to bring in power, then split it so half would go to a light on the backside of the garage, while the other half would go to a box in the middle of the rafters where that bare bulb hung. From that box, he/she brought power back to a switch, as well as split it out to the far corner.

Then there's another circuit that has a switch by the backdoor - I'll get to that next, when I install and wire three exterior lights in a bit.

And lastly, there's a whole other circuit that comes in the side, and seems to be powering a single outlet that is on the outside of the garage. There's a dead wire that just ends (of which I'll connect a receptacle so I can run power tools off that 20A circuit instead of the one now with all the lights), and a 220V outlet in the other far corner (that I know my old neighbor Trevor tapped into while he was building their house next door and living in a trailer, but that was before I had bought this place).

So anyway, wiring schematics are fun, but it was time to install these yard sale lights...


First I went around and just hung them all with self-tapping screws. And yep, that circular box is where the bulb had been (I pulled the wire running back to the switch cos I was going to use as much of that 30' or so as I could to string between the four light banks - instead bringing in power from the box a foot-and-a-half away).


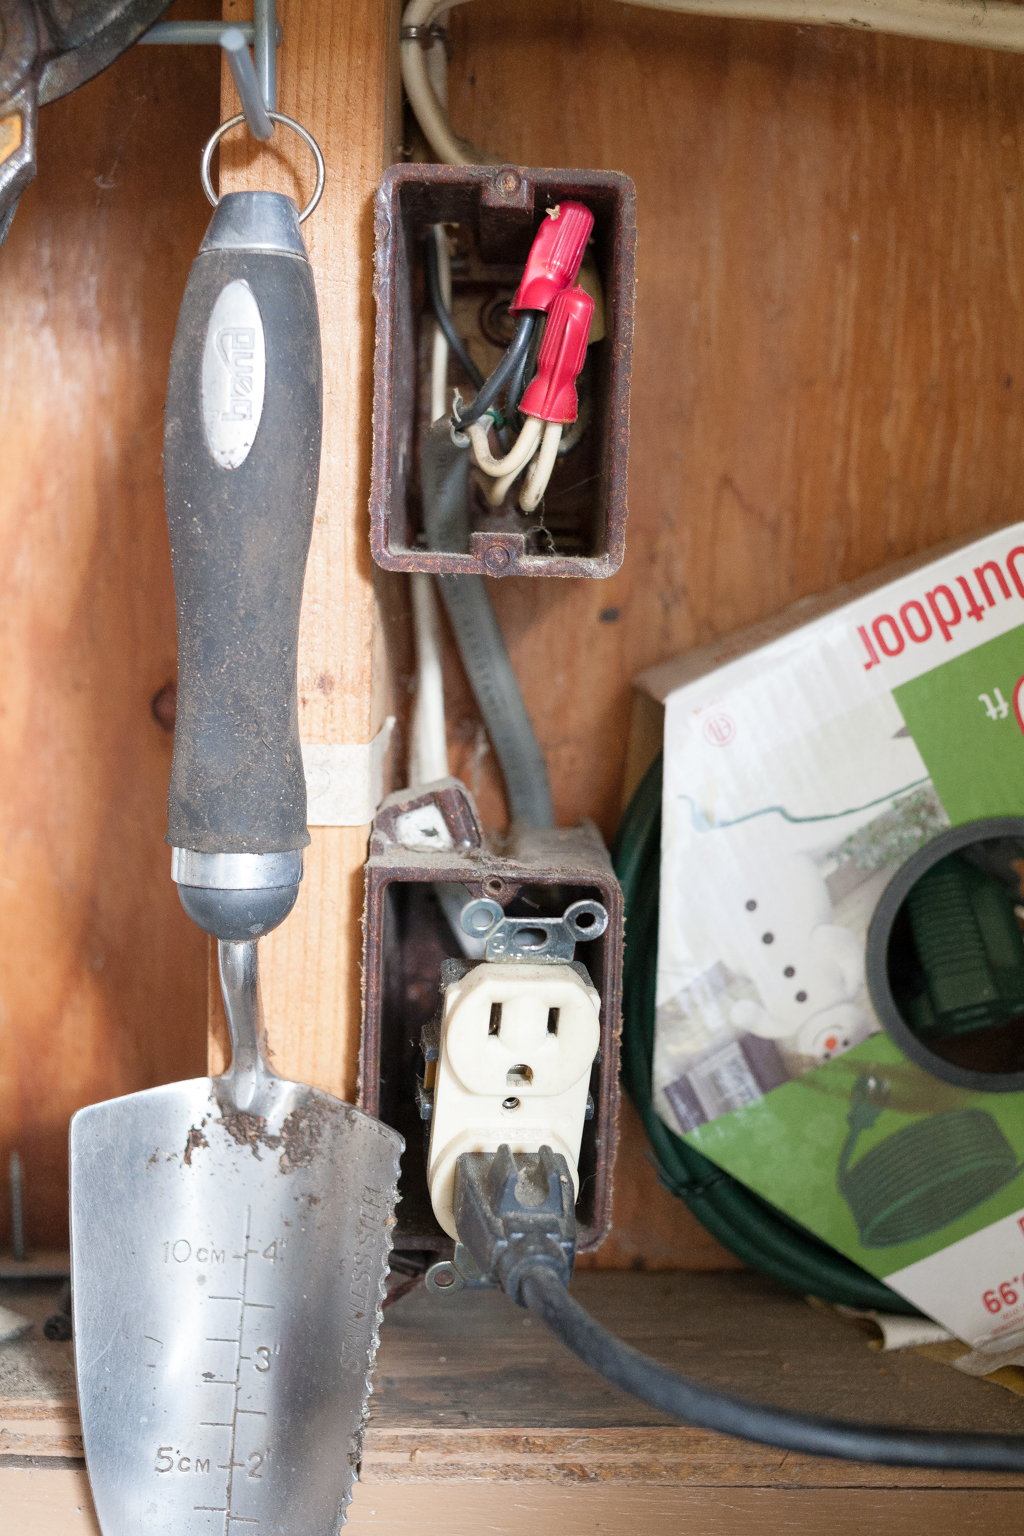
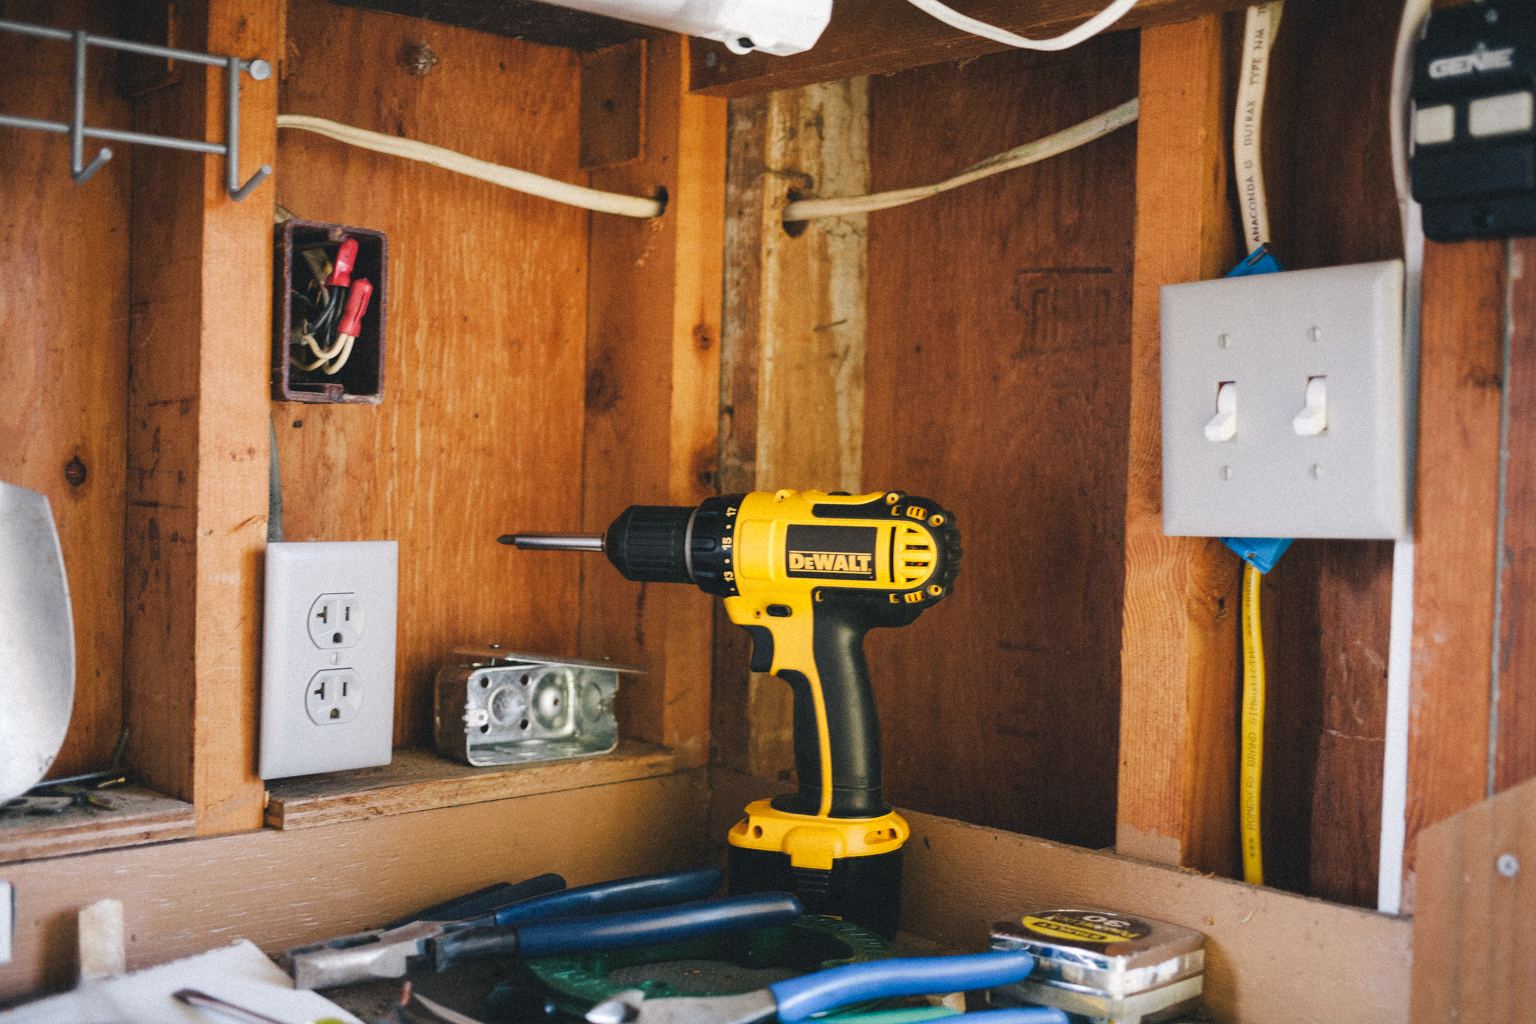
The corner was sort of a mess... The outlet is where the one circuit I was messing with came in, and the box above it is the other circuit (which just held the splice between the cable that came up from underground and the one that ran to now-gone exterior lights - of which I'll install three new ones soon and redo that box - heck, I'll even cover it so there won't be bare wire splices just hanging out). The switches then on the right flipped on the bare bulb and an exterior light on the backside of the garage (handy - but I'm going to replace it with a motion-sensor light I picked up at a garage sale a month or so ago for $5 so the new switch will just stay 'on').

A closer look at the two boxes for those circuits...


And the new switches - the one on the right will be for the new lights, the one on the left is for that backside light...


But since I wasn't using the end-line circuit the crazy electrician had wired, I had to pull power from that outlet box where the circuit from the house was coming.


Easy-peasy. I just pigtailed the hot and neutral to reconnect the receptacle, while pulling power over to the switch and then running each light fixture in parallel.

And done...


Then it was finally time to, well yeah, string the cable between all four fixtures. This, uhh, took longer than expected...


I was sort of killing myself working with 12-gauge cable (I could've used 14, but it's a 20A circuit and so whatever - the newer 12-gauge seemed more supple than the old stuff I pulled and reused, but that could also just be cos that cable is, well, probably thirty years old). But after a couple hours it was done, and the garage now has a bit more light than that bada** bulb was putting out...


So yeah... next will be wiring and installing those three exterior lights (I picked them up years ago at - yep - a garage sale, so I'll have to spray paint them an oil-rubbed bronze to match the front porch light and backdoor light that cost a touch more), and then installing that garage sale motion light so when we go back behind the garage to take out the compost after dinner it'll light the way for us...

Monday, October 11, 2010

front porch light.

Whoo boy. It always seems so simple. Case in point -

I wanted a front porch light.

So I bought it a few weeks ago from Rejuvenation (of course) cos they were running a porch sale (of course - I've only ever really bought anything from them when they had a sale or a promotion or I found it in the scratch-n-dent section). A simple thing to hook up, right? There was a beautiful, previous porch light after all ...

Well, haha - not so much.

But time to put on my electrician's cap (uhh, and belt) -

I knew the old light had been powered with the last of the original knob and tube wiring (the only remaining circuit to use the stuff was #11 - the ceiling lights, most of which I had ripped out long ago cos ceiling lights in general suck - like in bedrooms and stuff). So I knew I'd have to deal with that. I didn't know the extent of it until yesterday when I headed up to the attic.

I knew there was new Romex running out of the panel cos the whole panel had been upgraded (to 60A) at some point. So that meant somewhere (the key being 'somewhere') there was a splice where the Romex and the knob and tube were patched together. The trick was finding the splice. Fortunately, there was only that one circuit that still used the knob and tube so I could trace it with a tester since it was the only live knob and tube wire (since there was a mess of the stuff snaking all over the attic this was a huge help). But this still meant basically crawling over insulation all over the attic following the live old wiring to find the splice. But after maybe half an hour - hallelujiah! - I found it!

And then I remembered it - I had put that junction box in back when I rewired the kitchen cos whoever did the splice just had the bare wires (well, with wire caps) hanging loose in the attic. I shut off the circuit back at the breaker, disconnected the splice, switched the power back on and tested the Romex on the left side - power! And no power on the knob and tube. Meaning that was indeed the cable coming out of the box that I could splice into with new Romex cable and run to the front porch.

The next challenge was to figure out the wiring schematic for a circuit that was to have multiple lights (I am putting all ceiling lights on this circuit) all controlled by their own switches. After searching the web (and not finding much) and then a call to good ol' McLendons I was able to figure it out and draw up a diagram -

I love electrical stuff (as I've mentioned I think) but sometimes it's confusing as all get out. Once drawn out though it made sense - it's a mess of wires in each box but both the hot and neutrals loop through the circuit in series from box to box and the extra 14/2 cable to each fixture then is what turns each of them off/on (while maintaining hot/neutral over the entire circuit). And anyways, I had just bought a new 250' spool of 14/2 cable so I was good to go. So I headed back up into the attic to run the cable. Had to drill holes through the joist headers in the walls and run my (priceless) fish tape down to the hole I had cut out for the new electrical box, then back up and pull the cable through. A few times.

And then - just for fun - I decided to turn one of the living room outlets into a switched outlet. So I had to crawl under the living room through the crawl space (uhh, thank goodness my house sits high so it's pretty roomy under there albeit a bit dirty) and drill up - hoping not to drill through my living room floor and instead actually make the mark inside the wall. I was apparently blessed with some good luck cos everything worked okay and I got the new cable strung from the new box by the front door (with the new front porch light switch) over to an outlet on the side of the house without issue -

And after all of that - up and down the ladder to the attic over + over, under the house over + over, etc. etc. etc. stringing cables through insulation blah blah blah it all came down to one moment (the moment I love and dread at the same time) - turn the circuit back on and flip the switch.

(hold breath ... )

Boom!

It worked!

Ahh, good times. Now I still have to finish the circuit though - hitting up Julian's closet light (which while I'm doing that I'm going to replace it with a recessed can), the Jack and Jill bath lights (two wall sconces, a recessed can above the shower and a fixture above where the medicine cabinet will be) and my bedroom lights (since both of those rooms are stupidly on the same circuit as the fridge).

Sunday, August 1, 2010

electrical woes.

This was Electrical Mystery #2. Electrical Mystery #1 was the one in the kitchen when I was rewiring that circuit (and the result is here). But for this one, I sort of hate to think how long it has been since I have been stepping on and tripping over extension cords leading from the living room to my bedroom cos one day the bedroom circuit just decided to freak out. It was a Saturday morning and Julian came to me and asked why the fridge wasn't working (the fridge happens to be on an outlet on the other side of my bedroom so it is on the same circuit - hey, I didn't design the circuit OK). I said of course it was working I had just got something out of it. Turns out, uhh, he was right. It wasn't. And neither was anything on that circuit. Why I don't know. So I of course went downstairs to the breaker panel and checked if the fuse was tripped. Nope. Hmm, time to dig deeper so I grabbed a voltmeter and checked the panel. Hmmmmmmm, power leaving the panel on that circuit. So why were none of the outlets or fixtures working?

I tested continuity for the rest of the afternoon that day and was officially stumped. What I could determine was the first outlet on the circuit was out but there was f'in power leaving the breaker! What the heck!? So I let it sit.

Until today.

I had had enough so I crawled up to the attic to inspect a box I had pulled power into from an outlet below and wired a few splices into for my closet light, the ceiling fan and the wall sconces. There was no power going into or out of that junction box. But hmm, what was that ... ? A cable coming up from my bedroom. I tested it and it had power! What the heck ... so I checked and much to my delight it was on the bedroom circuit. So now I had one wire with power on that circuit. That one wire had to lead to the answer

So I followed it down. This meant taking down the drywall I had hung above my bed to see where it came from and where it went. I tested it -

Yep, power. After doing that I could see it - and my answer! It led to an outlet box below in the kitchen that I had actually sealed off with drywall when I hung sheetrock in the kitchen cos there was an outlet two feet directly below it so why have two outlets right there? Again, I did not design this circuit - let me just say that again.

But that had to be it. So I went into the kitchen with a drywall knife and cut out a square where that outlet box was and sure enough - there was power going into that box from that one cable but not leaving it -

I have no idea why. I still have no idea why. But I pulled off the wire caps on the neutral and hot splices and boom! The circuit lit up!

So I finished up with the electrical in my bedroom installing the sconces and testing and it all works.

What is weird is if I put the wire cap on the hot splice the circuit dies. If I take it off - it's fine. I still have to solve that mystery but no worries - I once again have power and it is sweet. I pulled the extension cords and tucked them back away in a drawer. And the sconces look pretty nice (I wasn't sure how'd they look - it was sort of a gamble for bedroom lighting).

Sunday, July 11, 2010

back entry light.

So after nearly two months I finally got the last light I was waiting on from Rejuvenation. Sheesh. So when I opened it up and held it in place to see what it would look like (minus the shade) it's not hard to imagine I was a little more than upset that it was cut the wrong length. After all that time and they could not even get it right.

Well, I tried contacting their CS that night but was on hold for like fifteen minutes so I fired off an email. This was Thursday. Had not heard back so on Saturday I decided to take matters into my own hands and take the thing apart to see if I could just cut it myself. It required some patience but with my handy pipe cutters (way cleaner and faster and easier than a chunky hacksaw) I took care of whacking 6" off it so it would clear the back door swing.

Then it was a simple matter of removing the old beauty -

(I don't think I can even advertise that thing on craigslist in good conscience)

And then installing the new one -

Fifteen minutes. It doesn't look like much yet cos the drywall and painting and trim are not done yet back there but that'll be finished by the end of the year. Yes -

BY THE END OF THE YEAR.

Then it'll look better and more in place. Though it was a little loose cos it was a new construction box nailed to an overhead joist I was actually able to use the existing work instead of having to completely redo it because some beavers had maybe been used to knaw through the drywall or some other random form of crappy work.

And lucky Dana - she doesn't know it but should be on the lookout for a large box in the mail ...

Monday, June 28, 2010

back door light.

Rejuvenation McKenzie porch light


So on Sunday I set out to do some electrical. Yes, the electrical I should be doing is figuring out why I still don't have power in my bedroom. That's next. But first - wiring up a new back door light.

It actually was pretty easy - just had to figure out what the heck wires were doing what inside the electrical box. And I really want to find out what the third switch on the right does - I think it might switch on a light that used to be on the garage but is not anymore. Anyways ... five minutes later and I had the neutral and hot wires figured out and spliced into them with a new wire to lead out to where I was mounting the new fixture.

Here we have the old light hanging above the door -

Yeah - a thing of beauty. CFL and all. And then - post-removal - of the fine craftsmanship of the previous owner -

And mine -

Well, mine at least stands up to, you know, code and all. I had initially cut the siding thinking I would center it between the back door and window but turns out that nail on the right is buried in a stud. Well, studs rule so over to the left it went.

And then the two of them compared before installing the new one -

Hmm - I have no idea why I decided to upgrade ...

And since I'm wrapping my mind around the somewhat mindblowing job of painting my whole house - uh, myself - I quick Photoshop'd what this would look like with the new paint color and trim -

It is much better. Yeah, the paint color, too haha.

Tuesday, May 18, 2010

um, wow ... lighting.

Well, for some reason yesterday I went to check out Rejuvenation's website (I think cos we're going to Portland Saturday and I was going to see the store's hours or something) and noticed in the homepage banner that they were offering a promotion - $100 off a $500+ order. And this is one of those places that never seems to have a sale or promotion (well, they do - twice a year I think but really ... ). So I called them up to see if at least went through Saturday. Uh, no luck -ends today (it's not even up on their website today).

So anyways, I already pretty much had the lighting for my bedroom and the back entry figured out and I didn't want to pass up a $100-off promotion so - after being on hold for 20+ minutes waiting for everyone else trying to place an order on the last day of the promotion - I got through to someone who then put me in touch with someone at the PDX store. My goal was to save on the shipping (a whopping 10% of the order total which seems awfully steep) by picking up the stuff the PDX store had and ordering the two things I would have to order so as to only pay shipping on those.

So after some finagling the order/deal with the girl on the phone (and still not 100% sure the charges are correct but I'll check it out when I pick up the stuff Saturday - the order total seemed pretty close) I got the following ...

For the bedroom on either side of where my bed will go (and matches the currently-remodeled bathroom light and the to-be remodeled bathroom lights) -

For beside the back door (to replace a bulb that's just hanging in a socket above the door right now - yes, it will mean rewiring this to mount beside the door about 5' up from the ground) -

And for inside the back entryway (um, it'll be fun to post a pic of the light that's hanging there now before I rip it out of the ceiling ... holy cow, that thing is a beauty) -

All very classic I think.

So anyways - they have to make the Rhone to my 28" specs and order the McKenzie but the other things I can all pick up on Saturday.

Next I need to order my bedroom fan before summer ... come on Restoration Hardware, have a flippin' sale (I did just sign up for their promotions/etc. emails).

Sunday, January 24, 2010

bedroom wiring.

Wow, I cannot believe it was back the end of May that I officially kicked off this blog by saying I was going to get to the bedroom wiring. And then summer came and I took off just about every weekend and did not do anything at all on the house. So now, eight months later I finally got off my butt and did it.

Wall sconces on either side of where my to-be California king canopy bed (could not fit a regular king and still have room for the sconces and room for the closet door to open and bedside tables and blah blah blah) will go and on a dimmer (duh, of course). I am hoping they work out cos it's a bit of a pain to move them if they do not, but thanks for the good advice Dana about watching out for the bed posts – hopefully they look OK.

A closet light now – had to pull power from the outlet behind the bed up into the attic and then back down. It was, um, a bit frustrating hanging the drywall in the closet ceiling. I might have not been able to uphold my resolution of no swearing while remodeling, but there was no one around to witness and I apologized to my house profusely afterwards. Uh, assuming I was not able to uphold that. I'm just saying.

The swatch in the middle is Benjamin Moore HC-98 providence olive. Someday I will be at the point where I can actually paint, but that will mean that everything else is done, including the carpeting (which I plan on using this stuff below) ~

Which is a little ways off. OK, so anyways - the wiring is finished. But I do need to do the structured wiring still that I mentioned in that first post (low-voltage stuff). Then replace the windows before I can actually hang drywall in there so I am not looking at insulation and 2x4s. Yes, that will be good.

But I am excited about this year and the progress I plan on making. Enough stalling. Time to get back to work.