Monday, September 15, 2014

time for a fence.

So after we lost Whisper to the neighbor's dog, I took it upon myself to (maybe, at long last) build a fence. This temporary chicken wire one just wouldn't do -


Nor would the six-foot-tall behemoth fence Trevor built a few years ago -


I guess I was looking for something that would fit more with the style of the house... So I drafted up some plans in my trusty sketch book -


I was going for a gate header that was notched just like the architectural beams on the house (and the ones I similarly replicated back on the garage)...


Then figured out supplies. I wanted to do this pattern of a 1x6 with three 1x2s in between, but holy cow were cedar 1x2s expensive. So... enter table saw. Its first real project! The beauty is that 1x4s were ridiculously cheap (I think they were something like $0.60 for a 1x4x5' #3). So with the table saw -


a pile of 1x4s -


and a Julian helper I set out to rip a bunch of them in half -


A half hour later... wallah - a stack of 1x2s -


That was the easy part, and the table saw was seriously a thing of beauty to use, if that phrase even makes sense (which I'm not entirely sure it works in this case). Anyway, I discovered at some point that cedar is not measured the same as other dimensional lumber... in that, a 1x6 is actually 6" wide (instead of 5-1/2"). It's kind of a good thing I discovered this before I started stapling the cedar to the frame - as it happened, it was just a matter of redoing my math (and then realizing of course that I had too much lumber... ).

But up went the 4x4 posts in quick order -


And then the 2x4 joists -


Making sure they were level -


That was actually kind of fun, I have to admit. And relatively easy. Measure 8' in between the posts, dig a post hole, plop a 4x4 post in the hole, level, and fill with concrete. And then I stained them...

Then it was time to start stapling the cedar boards. The math worked out perfectly - with a 3/4" gap in between each board (I intentionally had a maybe-larger-than-typical gap for the style I was after). But that meant I could just use a scrap piece of 1x lumber to set the gap - and so it moved along pretty quickly -


I won't go into the details of the nearly two months the fence sat with half a section in place because of my stapler that sprung a leak, my frustration of ordering a couple different parts kits but not being able to seal every leak, and the repair place in Seattle that then took another month-and-a-half to fix it. Needless to say, it will be a cold day in H-E-double-hockey-sticks before I take a tool there again to be fixed.

Anyway... then I had to build the header I had in mind from 2x6s and 2x4s. This required a jig saw to cut the 2x6 cross joist (and a wood file to smooth the cuts) -


And then a hack saw (to cut the 1/2" threaded pipe that was a little detail I was including to attach the 2x6s to the posts) -


Then attach the six 2x4s (similarly notched) and the header was finished -


Then... the gate, which I built from 2x4s -


K stained it, and I hung it -


And finally, the last little detail I planned was to stain the 1x2 boards the same dark stain as the cedar shakes above the house (and garage), and the wider 1x6 boards a much lighter stain. And then it was finished -


I have to admit - I like it. And I kind of like having a fence. Now I just need to build something between the back of the house and the garage to completely secure those three little chickens...

what the *&(#*$^&^%@#&*!@O#!?

So we got home late last night from being away for three days this past weekend. I went to check the water for the chickens, grabbed the waterer, and headed for the hose in the back corner of the house. What is that sound? I thought. It was coming from under the house, in the crawl space beneath the guest bath. Uhh, that's not good. I peeled open the covering to the entryway to find scalding hot water spewing out of the hot water supply for the shower. Racing around in the dark like mad, K brought a flashlight and I grabbed for the shutoff valve that I (now thankfully) had the foresight to install when I redid all the plumbing for that bathroom (I remembered reading how - since the shower faucet is essentially a shut-off valve in-and-of-itself - an extra shutoff wasn't really necessary, and indeed - the plumber who had done the install of the shower hadn't bothered to install them).

Phwew. At least hot water was no longer spraying all over the cramped little crawl space. But WTF!?

So this morning I went under there to inspect. Turns out - it was the bloody valve itself that had failed -


So off to Mclendon's I went to buy a new valve. The thing I noticed however, was that the new valve didn't look the same... In fact, it was missing the joints on either end (and the joint that - for seemingly no reason whatsoever other than the fact it was installed six years ago - had failed). My suspicion goes something like this: Sharkbite realized that the design was prone to malfunction, and so - sometime between then and now - updated it. Probably a good thing.

Regardless - the crawl space is soaked and I have a fan blowing through it now. May have to deal with some mold, but it's better than had it been the main bath that is over the basement - had that failed, half of the basement right now would be completely soaked (including my homebuilt gear shelf)...

So I'm counting my blessings...

Monday, June 2, 2014

Saturday, May 10, 2014

now we're cuttin' with gas!!

It was time.

With the recent router upgrade I knew a table saw upgrade was next. A table saw is one of those tools that pretty much any shop needs to have... and the ones I have owned have - well - have left something to be desired. Which has made it hard to either do some projects or - maybe worse - do them well.

Enter - Exhibit A... the first table saw I bought at a garage sale when I first moved into this little house probably for twenty bucks or something and that was more or less completely one-hundred-percent useless (the fence was basically just for decoration cos I don't think it really even secured to the table top - and, umm, note the lack of even a rail along the table... ) -


A 7" Black & Decker. Oddly - with less cut capacity on the right then the left... maybe this was the left-handed model?

Umm - yeah anyway... I ended up selling that on the ol' Craigslist and - uhh - 'upgraded' (note the use of quotation marks) to this next one  - also found at a garage sale but for $40 - which I remember being really excited about although after using it for the past few years I'm not sure exactly why... maybe cos it was 10" instead of 7" and had a 'fence' that at least tightened down to the table??? -


Ahh yes... Central Machinery. A fine tool indeed.

But yeah - that's actually a pretty typical 'portable' or 'benchtop' table saw sans a stand (I - umm - just used saw horses)... plastic base, aluminum top, etc. etc. Light enough to toss around one-handed. Juggle. That kind of thing... I actually have used it to make some stuff - but I think more often than not I ended up using my circ saw and a sweet straightedge to cut down any sort of panel sheets because this plastic table saw was - again - more for decoration...

So then enter... (hopefully... ) my third and final table saw...


Umm - yeah... the motor alone on this bad boy weighs probably two times as much as that plastic toy above...

---

Rewind though a bit...

A month or two ago I spent some quality time on the internets researching table saws. Basically - there are the portable kind (like my #2 saw) that are made from a combination of plastic and aluminum (or maybe stamped steel on the more expensive ones), the cast iron cabinet kind that are expensive ($1k is a cheap one and they sky rocket up from there) and immobile (they weigh 500 lbs or more so once they're set in position it is there that they remain forever), and the 'hybrid' (or 'contractor') kind - mobile bases but heavy, legit cast iron table tops and heavy-duty trunnions and such.

The main difference between cabinet and hybrid saws is that hybrids still have their trunnions mounted to the table top (like the portables) vs. the cabinet or base (hence - the name 'cabinet' saw - which means the hybrid style can be more prone to vibration). But the ability to be able to move around the shop since my - uhh, 'shop' - is my garage had to trump that so a hybrid it would have to be .

I then researched hybrids... and landed on a model that's no longer being made (it's current version - two iterations later - has been cheapened with stamped steel vs. the better but costlier cast iron which is a little disappointing but no worries thanks to being able to find outmoded things on Craiglist): the Ridgid TS3650.


According to Fine Woodworking - this saw is 'a furniture maker's saw' which I know is saying a lot (and - well - I plan on using this to build furniture). True - the trunnions are mounted to the table-top - but nevertheless they're one-hundred-percent solid cast iron and pretty dang legit -


Reviews on it were stellar. I actually didn't read a single negative one... the thing weighs in I think at close to 300 pounds, has a poly-V belt just like cabinet saws (which lasts longer and induces less vibration), a whopping 36" of rip capacity to the right of the blade (and 12" to the left) - which can even be extended by adjusting the rails (and which I may do I'm not sure... thirty-six inches seems pretty reasonable at least to start).

So it was just a matter of watching Craigslist for someone selling one...

A few came up but they either looked like the cast iron was in too bad of shape or priced too high. Until last week... one popped up way north in Marysville for the right price and looked to be in excellent shape. The family apparently used it to build their deck years ago and then it sat in their garage.

I hauled up there the other day in between morning and evening traffic to pick it up - which involved having to have the wife help me disassemble it just to get it in the bed of Stuart. Sheesh - it was heavy!

Once home I had to clean and reassemble it - which I thoroughly enjoyed since it gave me the chance to tighten some nuts and bolts and make all the fine adjustments for which this saw actually allows.


Some Scotchbrite pads, mineral oil and Johnson's paste wax were in order for the cast iron - and with the help of my random orbital sander and the pads I was able to shine the top right up!


Putting on the cast iron wings required K's help to flip the saw upside down while I lined them up and hand-tightened the bolts -


Then flipped it back rightside up. Umm - did I say this thing is heavy!? After making lots of adjustments - squaring the blade to the miter slots by adjusting the front and rear trunnions, dialing in the fence gauge (wow it'll be so awesome being able to use the ruler on the rail to set the width of a cut vs. always having to use a tape measure cos that little toy saw didn't have an accurate ruler... ), truing the fence to the miter slots, and setting the stops for the miter gauge and bevel - I finally got to turn it on...

Ahh... it was sweet music to my ears... so quiet and just... 'solid'-sounding. Like the difference between the new Porter Cable router vs. the Ryobi one I had used all those years before.

---

So then - besides making some feather boards - what will be the first project for this thing... ?

---

ps - I plan on building some portable infeed and outfeed tables for handling sheet goods and being able to accurately guide them along the fence... along with a thin plywood cover to keep the cast iron dust- and rust-free...


backyard chickens.

So with a little bit of cajoling from K - I caved and agreed to getting some chicks to raise in the backyard. It seemed like they'd pretty much take care of themselves, they're 'green' (i.e. they create great - umm, waste - for compost that people actually buy at big box home improvement stores and they eat food scraps and bugs and take care of the yard), and - maybe best of all - they'll lay delicious eggs.

It seems the idea of raising a backyard flock is pretty popular these days so by no means is this anything revolutionary, but it's sort of a big step for me. No worries though - as soon as we got our cardboard box of chirping chicks home from the local feed store I was hooked.


Our little chicks act more like puppies playing with each other than chickens... they chase each other around, never peck at one another, and sleep in a big ball of feathers with their heads all on one another. They're adorable.

But clearly getting chicks necessitated building them a suitable home. Not wanting to invest hundreds and hundreds of dollars whilst trying to keep things simple I opted for an A-frame design. But I couldn't just throw together some 2x4 + plywood monstrosity... I wanted it to - well - sort of match the house. Or at least look like it belonged in the same yard. Details details...

So I went to The Depot and picked out a bunch of outdoor treated (not pressure-treated) stock and got to work...


First things first... construct the A-frame and attach the chicken wire -


One end would have a door for them to come in and out cos we planned on letting them free range in the backyard (which would mean having to throw up a chicken fence - but fortunately I found a huge spool of 2x2" fence wire behind the garage perfectly suited for that) and the other would be solid. I had lots of leftover cedar shake from doing the front porch gable (and finishing it) and garage so I thought that'd be a nice touch.


So then for the nest box something like this -


To build each of the panels I just used a sheet of thin plywood I had leftover - then tacked on some leftover roofing felt and 1x3s for trim to get things started -


Then stapled on the shingles -


and boom!


Same thing for the back -


Added some acrylic sheet roofing to the non-nest side for wind/rain protection whilst still letting in light, painted the trim to match the garage and back doors (Benjamin Moore HC-10 stuart gold) and stained the cedar to match the gables and... A-frame chicken coop!


Granted... it'll require some improvements - like another matching panel to go below the nest box on the west side of the coop to protect the little girls from wind/rain and keep them dry (stupid rain). And we'll see what else - but at least for now they have a nice little home for when they're not out and about pecking in their run.

I do love these little chickens...

(Whisper - New Hampshire Red - in front with her sister Willow - same breed - behind... and little Thump - Americauna - on the right... )


(Thump and - umm - either Whisper or Willow... )


(Thump... the crazy one... )


(And little Dori... )

Friday, April 4, 2014

router table.


-----


It was time.

I want to be able to build my own picture frames (along with many, many other things) and so I tested doing that towards the end of last year. But it was stupid difficult with the router setup I had (which involved a $20 garage sale Ryobi router - which worked okay by itself so that wasn't the big deal - but no table or easy way to route small stock like that used for frames). At the same time - I realized of course it would be really stupid easy if only I had a router table.

So I searched the ol' Craigslist and found someone selling a nice Rockler tabletop for fifty bucks. Check. And being cheap - uhh, I mean 'thrifty' - I scrounged and scrounged for a way to make that ol' garage sale router work (which would have involved making my own router plate - no big deal actually - but ultimately it would be a total pain in the butt trying to a) change the bit with the router mounted under the tabletop and b) detach the router from the table for those projects where I would want to use it handheld).

So it became obvious I would need to cough up some change for a new tool. Rather than just make due again - I searched and searched and landed on the primo Porter-Cable 895pk (which included a plunge base for handholding the tool and a fixed base to mount to a table, along with a gadget to adjust the depth of the router bit from above the table).

Next up... a stand for the Craigslist find tabletop.

Of course I could buy one - but that'd be no fun. So I scrounged up a plan for one and got to work...

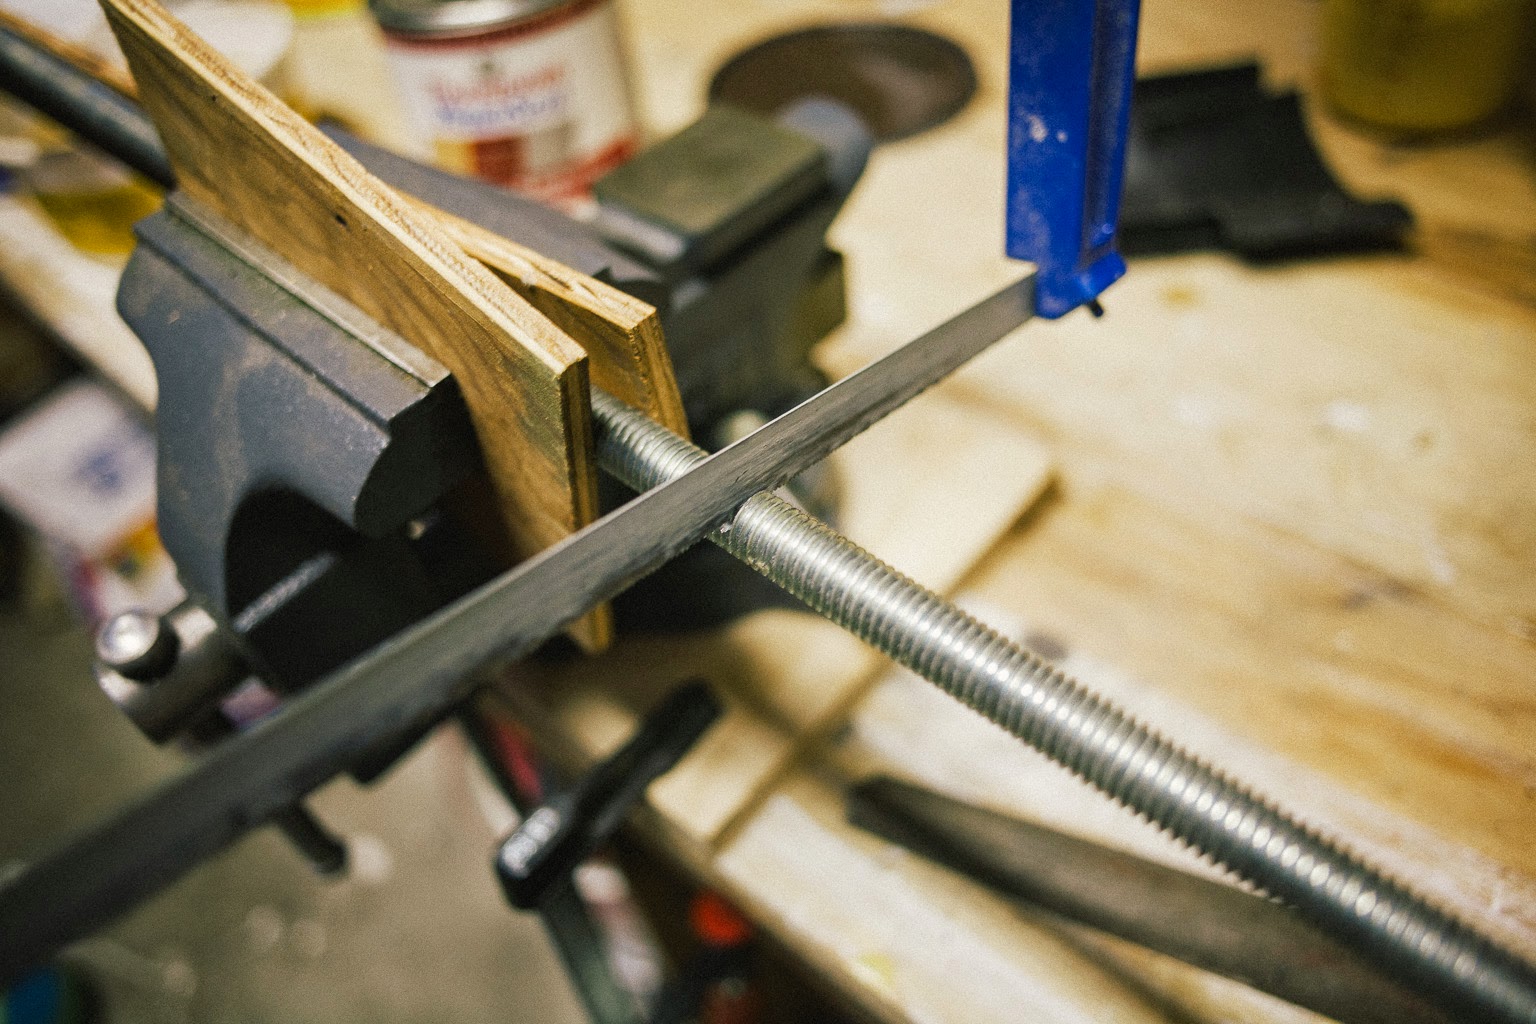
First we planed all the 2x4 stock -


Then I went to town on all the dados... which turned out to be a major pain but in the end I learned a couple of things - it just took WAY longer than anticipated -


(I had started using a router but realized quickly it was way too much material to remove with a router so moved to the table saw-slash-chisel combo... )


(... then used the router to clean up the dados... )


And... done -


Then glued the legs up -


In the meantime - I drilled 3/4" holes in the stretchers to insert hardwood dowels (since the screws holding them together would be drilled into end grain which isn't very strong and the wood could split). Then inserted the glued dowels -


And screwed them to the legs -


Added two 3" wheels to the back legs cos I knew this table would need to be mobile -


Then got to work on the switch I wanted to install so I wouldn't have to always reach under the table every time I needed to turn the router on and off. This took a few additional parts (but ended up being the easiest part of the whole assembly - I love electrical!) - including a 4" metal box, 15A outlet and switch, 14/3 15A extension cord and some miscellaneous electrical things I had lying around.

The wiring schematic looked like this -


Then I got to have some fun wiring it up!


Then attached to the stand...


And the stand was complete!


Now then... for the tabletop. Uhh - turns out what I bought from the dude on Craigslist was not in fact a router tabletop... but a drill press table top. No worries though actually (the only real difference was the drill press table top didn't have a miter slot - but after some Googling I agreed with a lot of opinions out there that a miter slot really isn't all that useful). And maybe most importantly - the used tabletop came with a fancy Rockler fence which was worth more than $50 in and of itself...

So I visited the local woodworking store, got hooked up - and went to work.

Here then is the tabletop... before -


I traced the outline of the cutout I would need to insert the fancy router table plate I bought and rough cut it with a jigsaw -


Then taped the jig to the table -


And routed the rest of the opening with a 1" pattern bit -


To get the final opening like so -


Along with the jig and plate - I had also gotten a leveling kit for the plate to level it to the tabletop (shown attached from the underneath here) -


Then it was time to (finally!) mount the router to the plate. And - uhh - this is where the trouble really insued... Sparing the details - basically the plate kit came with the (seemingly) necessary screws for a few different brands of routers (along with various holes for those different brands - why router brands can't just all get on the same page and have a universal standard for router bases I don't know... ). But two of the screws (#10-24) included for the Porter Cable routers didn't quite tighten - and in the process of trying to tighten one of them it - uhhhhhh - broke off in the router base.

Awesome.

In my after-that-little-fact sleuthing I read in some fine print an update to the plate's product description -


Sweet. Good to know. Well... a little late for that info...


(note the 1/2" screws I had to purchase)


(and the plastic sub-base - which indeed is not supposed to be mounted to the plate with the router base as I correctly had it - but which ended up being why one of the 3/4" screws it included broke)

But... after all that (and scrounging yet again for a new base on Ebay - which isn't the biggest deal cos now I'll use the base with the broken-off screw as a fixed but unattached base - for when I don't want/need the plunge base - and leave the Ebay find base permanently attached to the table)... it was finished!


-----


-----


Now time to use this puppy! It'll be soooo much easier routing things with a table!


-----


Things learned:

- THINK about the design and putting all the steps in order to achieve the most accurate fits of pieces and - ultimately - the most beautiful finished work (see below... )
- ALWAYS leave extra material when first cutting stock 'to length' (particularly for the planer - see #3)
#1 - if being joined, do not necessarily cut wood stock exactly to size (case in point: drilling the rails and inserting the dowels - once inserted, the rails really needed to be planed on both top/bottom to make a nice, clean-looking fit for the dowels - I should have cut them mostly to length [see point #1 above and #3 below], drilled and inserted the dowels, then planed them along with the rest of the stock)
#2 - if at all possible - use the planer to 'cut' rough stock to size (case in point: instead of using the table saw to trim off 1/4" of each side of a 2x4, use the planer)
#3 - if planning to plane stock after it's cut - cut it LONGER than necessary to allow for the infeed/outfeed ends of the stock to get gouged slightly by the planer - then plane and cut to final dimensions
#4 - use the planer more precisely (there's a height gauge for a reason!) - take note of final planing heights for certain pieces of stock so not everything has to be planed at the same time (see point #1 above) but can ultimately all be the same height once planed (even if not in order)
#5 - remember to consider the amount of material being removed when deciding how to best remove it (router for small amounts of material vs. table saw/chisel for large amounts)