Saturday, November 19, 2011

ugh. plumbing.

So some things don’t always go as planned. But they work out in the end. Like take this past Monday ... I was literally screwing in the final screws of the sheetrock I had hung the day before when apparently my kitchen sink, well, stopped working. As in refused to drain.

Ugh. I hate plumbing.

I assumed it was something with the garbage disposal. So I halted progress on the walls and shifted gears to figuring out what was wrong with it. I spent three nights on it. The first was spent trying to plunge it and then taking it apart to figure out if it was one side of the sink or the other. The second night included a trip - then another - to Home Depot to get a snake - and then a bigger one. Didn’t work. The block wasn’t budging.

Ugh. I hate plumbing. I should’ve been working on my walls.

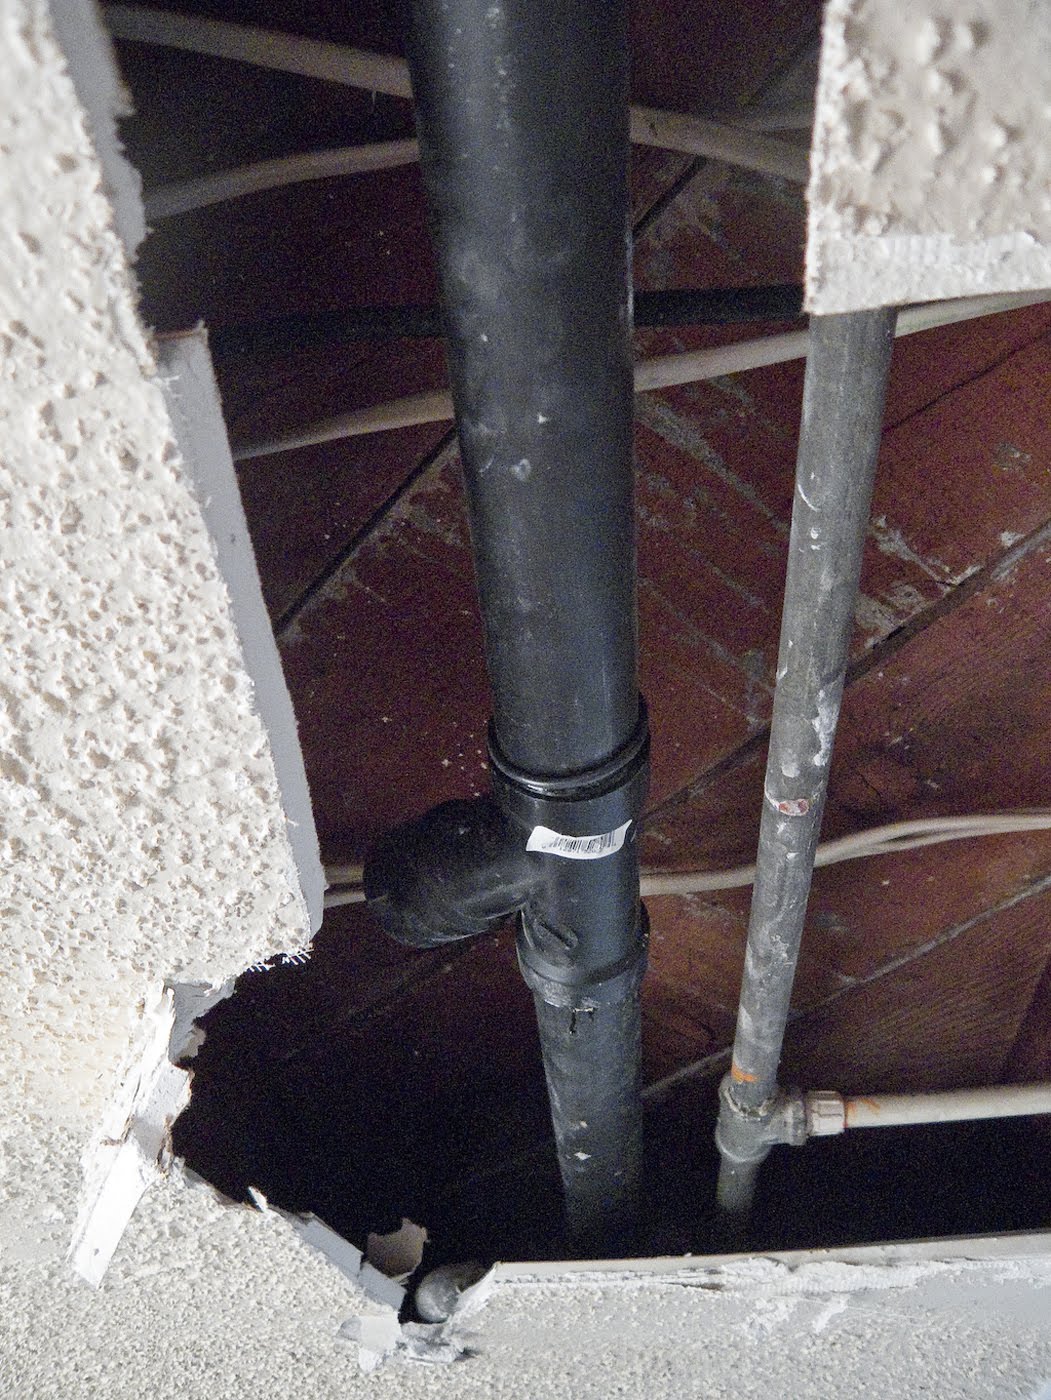
Finally on the third night I took a whack at the drywall ceiling in my basement - who hangs drywall ceilings in the basement anyway? (umm, it’s sort of convenient being able to access the pipes and wires etc. beneath the floor above) - with my sawzall. And stood staring up at the drain from the kitchen that whoever had installed - well - hadn’t bothered spending the couple of minutes it takes to grade it. So it had literally been resting on the drywall. Yeah - level.

So I quickly surmised that after who-knows-how-many-years stuff had collected in the level spot of the 1-1/2” ABS pipe and finally had enough. So ... I took my sawzall to it, too. Followed by another trip - this time to Mclendons - to get a 10’ length of pipe, a T-fitting and some couplers.

I completely cut out a 9’ length of the old pipe, fitted the new cleanout and couplers and shoved it all up into the ceiling - then glued it all together -


It was then just a matter of cutting off a foot of spare 12-gauge electrical cable and separating the three wires inside to use as hooks for the pipe to hold it up at a downsloping angle (short lengths of cable work great - just loop them around a self-drilling screw and drive it up into the plywood - then loop them around the pipe and twist them off to hold it). Made sure it - well - was sloping down towards the main drain line (1/4” per foot I believe is the standard) - then all was finished a couple hours later.

Gave the glue some time to set and tested ... held breath, turned on kitchen sink and let it run ... no backing up. Phwew. Problem solved.

And I thought back to our trip to MO a couple months ago and about talking to my mom about how they just call ‘A Guy’ to come out and fix stuff and how I - well - do not. Probably because I’m stubborn and I have to figure this stuff out and fix it on my own. But I guess also cos I’m cheap - and Guys are expensive. For about ten bucks I got the 10’ of ABS, couplers and clean out - that would’ve cost at least a couple (if not a few) hundred to pay A Guy.

And there’s something satisfying - at least to me, after the dust and irritation settled - to having figured it out and fixed it myself. And knowing that now it’s done right and I shouldn’t have to worry about my kitchen sink at all.

Now ... back to the walls.

sheetrock.

So Sunday rolled around. Yep - time to hang sheetrock. This is how my room has looked for the last - umm, maybe three years (maybe more, can’t really remember anymore) -


Well - the speakers and the doors are new ... so yeah - time to hang sheetrock. But first - I caved. I figured I had the audio wire so what the heck - I ran the cable for two surround speakers and a center speaker. Now it’s in the walls for when I get around to possibly using it. It’d have been much harder to do that once the walls were up.


Then once I had that taken care of I got to work cutting and hanging sheetrock. Uhh - I forgot how heavy that sheit is. And how much of a mess it makes cutting it. It’s dusty. Really, really dusty. And did I mention heavy? Julian helped hold while I screwed the first piece in -


I used my jigsaw to cut the holes for the outlets and speakers -


And after I think ten hours or something it was all up - and then my room had walls -


The problem is - well - that it’s my bedroom. And hanging drywall is dusty. So I need to hurry up and finish mudding and taping. Cos in the meantime - and I’m lucky that I have a hole where the piano would normally be (which I am going down to Portland to play for the first time in almost six months) - I’ll be sleeping on the floor in the living room -


So yeah - have to hurry up and finish this little project.

Sunday, November 13, 2011

doors.


I remember maybe grabbing this three years ago or so. We were on press check in Portland and stayed at the DeLuxe. I liked the very film noir motif. And the door hanger. So I yoinked it. The flip side says ‘Quiet on the set.’ I’ve been holding onto it since then until when I finally hung up my ‘real’ bedroom door. The previous one was a Home Depot thirty-dollar beauty hollow-core POC complete with classy faux gold door knob. Julian’s bedroom has the same one. He’ll have a new door in the next couple of days. There were six total interior doors to hang. I bought them all a long (long) time ago. No - long time ago. They’ve been stacked against each other down in my basement for a while. Four of them now are hung. Two more to go. It’s been a process.

Let’s see ... it started with priming. That was easy. I always use a roller to prime. Once it’s dry I sand it down with some 220 velcro’d to my orbital sander. Then paint for real. I’ve been using Olympic Super White semi-gloss on all the trim since I started painting this place. And I’m a firm believer in Flotrol - it works beautifully on semi-gloss (and would on gloss as well but I’ve never gone there) and makes a HUGE difference in the end result (as in - no brush streaks). Just saying.

This has been - umm - quite the learning process. The first two doors I painted before mortising and boring the holes for the latches and locks. Mistake #1. Paint after. There have been plenty more but I figured by the time I got to the last of the six doors I’d finally have a process that worked and would have learned how to hang a door properly. That’s how it usually works. Like Mom said a long time ago - ‘your first house is your practice house.’

I had to touch up the paint on those first two.

Mistake #2: assuming they just fit. Without even trying to put them in the door jambs. Yeah. They didn’t. By only about a quarter-inch but that was enough to halt the whole process until I could dump them all in the bed of my truck and haul them over to Katie’s parent’s place to gratefully borrow her dad’s jointer planer to whack off an eighth of an inch (a sixteenth off each side). Grateful cos I’m not sure what other tool I could have used that would have made a nice, clean cut (my table saw wouldn’t have cut it - and I’m not sure if the circ saw would have either).

But with them then more or less fitted to their respective jambs I was able to break out the belt sander I was given by the dude from whom I bought the table saw to shave off a bit here and a bit there where the jambs weren’t perfectly square. Once they were all more or less perfectly fitted, I went to start boring and mortising.

The first door I just used a chisel. Not perfect enough - don’t like doing things by hand. Well, not when woodworking - like to be precise. So I broke out the router. Much better. Still had to chisel the corners from the hinge mortises and such but the router did most of the work and did it really, really evenly.

While boring the holes through the stiles for the latches and locks - by the third door I realized it was easier to a) first drill a 1/8” pilot hole for the much larger 1” bit to follow and b) drill both horizontal 1” holes straight through the 1-3/8”-thick doors first ... then, once they were bored as deep as they need to be - going through the face of the stile with the 3/4” bit for the lock pull and door knob. On the second door - with only 3/8” to spare with a 7000RPM drill (or something like that) I got off track and almost ended up drilling up through the stile face. Not cool.

Then lots more little pilot hole drilling for the screws to hold on the door knob plates and hinges and latch plates and stuff. Brilliant.

So backing up - the process looked like this:


Drill pilot holes through the door stile.


Bore the 1” holes through the stiles, using the pilot holes to guide the much larger bit (since there is only 3/16” allowance from front to back without accidentally drilling through the face of the door.


Bore the 3/4” holes through the stile face for the latch and lock.


Trace the outline of the latch plate and then roughly route out the shape - taking care (since I’m doing this freehand without a template or jig) not to go outside the lines.


Using a 1” chisel - chisel out the corners and sides to make it perfectly square.


Install the latch plate to make sure everything fits.


Install the door knob, lock and doorknob plate.


Onto the hinges - kind of the same thing as for the latch plate ... trace the shape of the hinge, route out with care (after setting it to the correct depth since it’s different than for the latch plate) and then -


yep ... chisel it square.


Then install the hinge.

Once that’s all done - paint!


And that’s just the beginning ... then it’s time to hang it in the jamb. It’d be much easier to have prehung doors rather than fitting slabs to existing jambs, but I’m never one for doing things the easy way. That and prehung doors are much more expensive and all the jambs in my house were pretty darn square.


I’ll get to the installation in a bit ...

structured audio.

So back this past summer at a yard sale I found a pair of bookshelf Technics speakers. I think I paid five bucks for them. They matched the ones I bought way back in high school that I’m still using on my home system (partly because I’ve never seen anything for not a huge wad of cash that sound better and partly because they just keep kickin’). A little while later I scored another subwoofer at Goodwill (the first one I found - a Klipsch - is being used on my studio monitor setup) - an 8” KLH that was in perfect condition for twenty bucks.


And then I got to thinking ... hmm, I could put these in my bedroom. More importantly - since my walls were still missing - I could modify the speakers to in-walls and run all the necessary audio cables and such and move on the plan I came up with a while back to get structured audio in my bedroom.

So I got to work with a Wonderbar and hammer -


and in no time I had them all taken apart (they were all just glued anyway). I rescued the crossovers from within each box and set them aside. Now the real work ensued.

I realized I needed to route all the inside edges of the front baffle in order to give them a lip that would hide the uneven hole in the sheetrock I would be cutting for them. And then I had to cut strips of the black contact-type paper veneer from the sides I was throwing out and glue them onto the 1/8” edge I created after routing. It was a bit arts-and-crafts but it turned out looking pretty good. And so - with all of that done - I now had a pair of in-wall speakers (for $5 and an afternoon's worth of work).

I calculated the volume of the boxes before I cracked them open with the Wonderbar and converted the measurements to what I would need the volume to be in the wall. But first I had lots of cables to run from the bedroom to the basement closet. Two 48’ lengths of in-wall speaker cable (I had gotten a 250’ spool from Amazon for $20) - and the rest of the structured wiring ... four Cat-5 runs (two for a new outlet where I’ll be putting my desk and two for a possible future TV and Mac Mini/Apple TV), a 50’ length of Toslink digital audio cable (picked up again from Amazon for $30) assuming the TV/Mac Mini will have digital audio out (my receiver down there I’m using initially doesn’t have digital audio in but I wanted to at least get the cable in the wall for now), and I bought a RG6 splitter to split the cable coming in the house in my bedroom going down to the basement for the modem - the split goes in the bedroom wall up to where the possible TV will go. Last but not least - I had the thought of moving the electrical outlet from the floor up to where I’d be installing some 2x4 brackets for the TV mount - that way if I do get a TV and mount a Mini or something up there the power will be right there.


(that's looking up through the hole I cut in the basement ceiling to the wires coming from the bedroom - I had to use my fishtape across the basement from here to grab them and yank them through to the closet on the other side)


(in the networking closet - the speaker wire and my old receiver I bought back in college that will serve the purpose of bringing audio into my bedroom)


(the outlet I moved up from a foot above the floor to 5' up and behind where the TV would be mounted)

I had already wedged some 2x4s in the walls to make the same volume as the speaker boxes - 


The rest of the process then for each ‘box’ in the wall was to mount the crossover network and stuff it with some acoustic fill I got from some Infinity speakers I grabbed out of a 'free' bin at a yard sale a few years back (I may remove or adjust the amount of fill based on how dampened the speakers are once I get them installed after the sheetrock is up).


And the wall looked like this (complete w/ those 2x4 horizontal brackets for hanging a TV wall mount centered between the speakers) -


So now it’s time to hang sheetrock. It’s crazy. I think I’ve had these walls torn apart for something like, oh - I dunno - three years. At least. I lost count. But tomorrow I will hang drywall and that will be that. So before I can I had to test to make sure everything worked - so I had to connect the subwoofer to the binding posts in the wall - then connect the speakers to their respective crossovers and hook the wires up in the basement to the receiver and fire it up -


It worked! But the last little bit I needed to test was to make sure that the VNC would work to drive the server downstairs from my old Powerbook - thankfully the Chicken is still available for 10.5 cos the screen sharing built in works spotty at best. Yeah - I’ve probably mentioned how much of an un-fan I am of 10.5 ... but anyways - the Chicken worked great and my plan to turn up the volume on the receiver louder than I’d ever need it - then control the volume of iTunes on the server through my laptop (and track selection etc.) - worked perfectly -


So the only thing that remains is a little RFI that I may need to get a powerline filter to kick. Otherwise everything is up and running and all set to hang sheetrock tomorrow. Oh - but I might run a couple more speaker cables ... for surround sound.


---


Cost of project

- $5 Technics bookshelf speakers I found at a yard sale that I converted to in-walls
- $20 KLH 8” powered subwoofer from Goodwill
- $20 250’ spool of 18-guage in-wall speaker wire from Amazon
- old Pioneer receiver I had lying around (but something similar - an old receiver - could probably be found easily on Ebay or craigslist for less than fifty bucks)
- $20 Leviton 8-in/out single-gang speaker wall outlet
- several days worth of work modifying the garage sale speakers to in-walls and running all the cables and building the stuff in the walls