Wednesday, August 24, 2011

garage continued.

I've been trying to piece together prepping the garage in between seemingly a dozen other things. Luckily this project will not be nearly as ginormous as painting my entire house this time last year. But like coming back from a backpacking trip this weekend Sunday evening to get hold of the paint scraper and pressure washer and scrape and wash the siding and under the eaves of the two sides I'm prepping to paint. And Katie had been a dear - when I opened the garage on our return I saw spread out on the floor all the trim primed and everything.

But before she could prime them I had to do some prep work one evening last week. Like set up wood shop in my driveway -

Then do some cutting, planing and routing. I consulted my diagram and other notes for what it was I was supposed to do. Like take three 1x2s to the table saw to rip them down to just an inch wide which would let them stick out from beneath a 1x8 above by just a quarter inch (instead of three-quarters of an inch) -

Then pretty much plane down just about everything at least a little - and some more than a little -

Having a planer is spectacular. It's like sanding - only a hundred times faster. And it made it possible to take a three-quarter-inch-thick 1x2 (the same 1x2s I ripped to an inch wide) and plane them down to a half-inch thick. And of course just get all the muck off lumber by sending it through the planer once on each side.

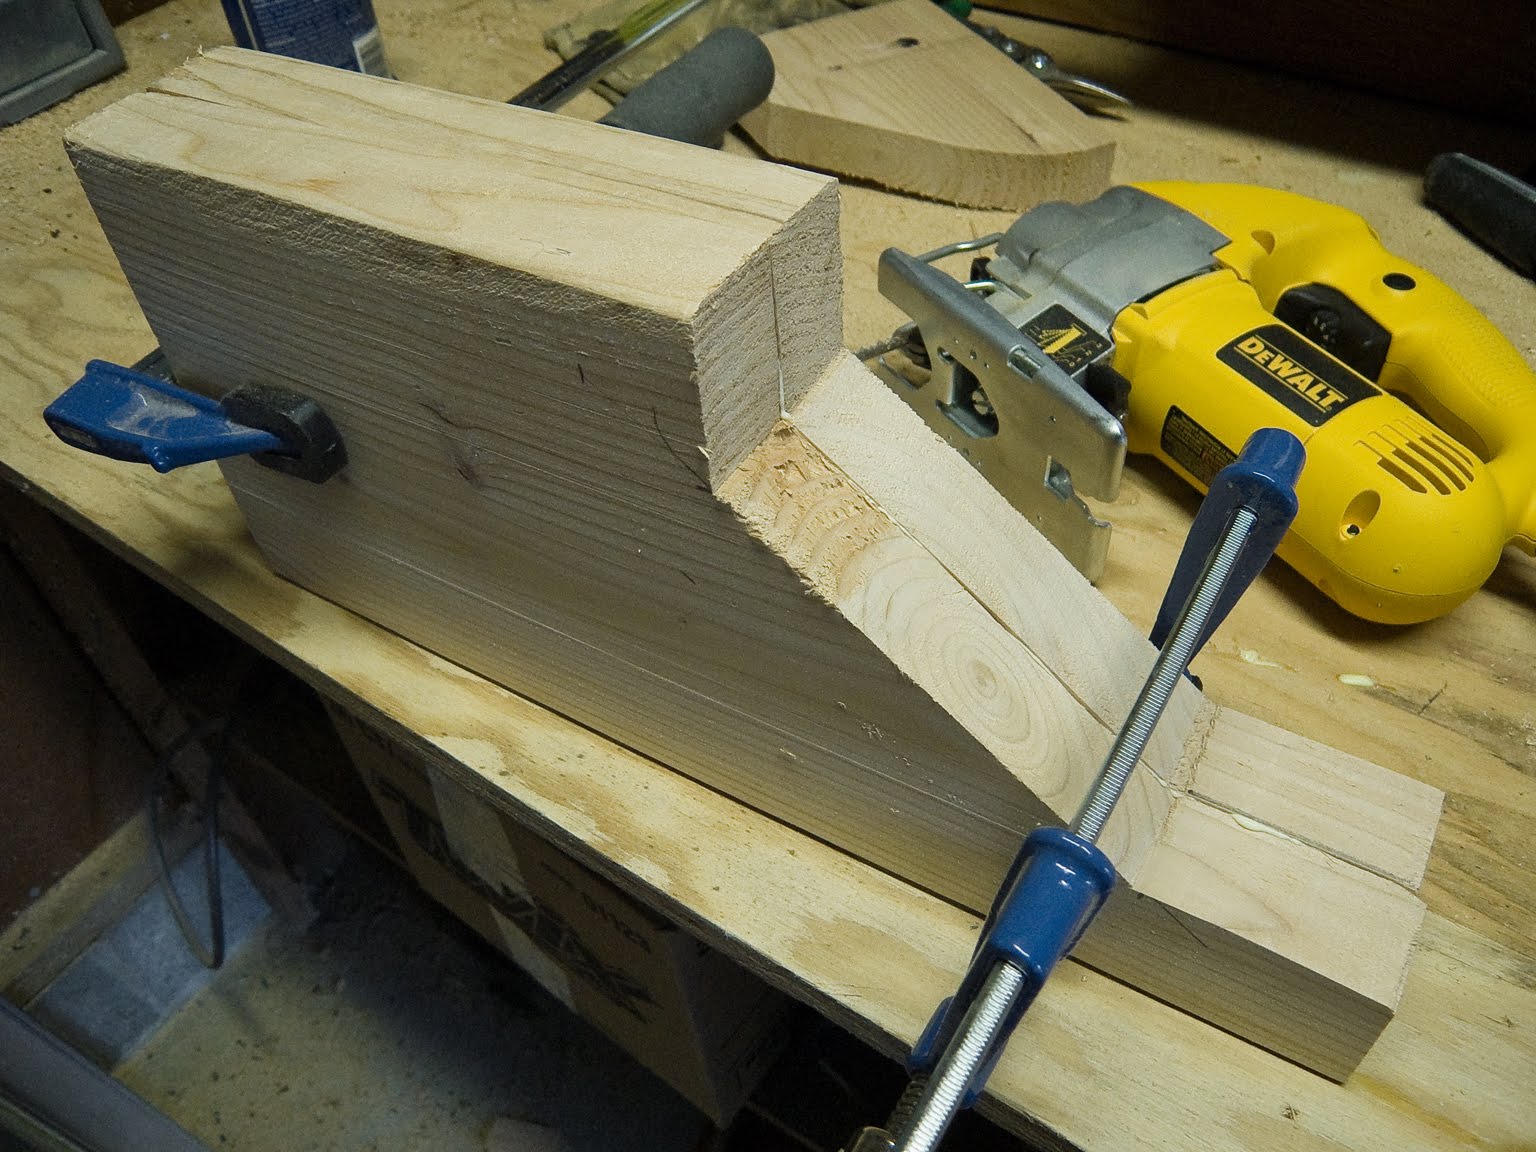
But then something a bit more challenging to do ... cutting out the architectural beams I was building to match the three on the front porch gable. I luckily got the idea to use two 2x8s after realizing I didn't have a saw that could make the necessary cut through a 4x piece of lumber. So I traced the outline of one above the porch and got to work -

Got to use my new (well, refurbed) jigsaw. Holy cow. All this time I had been using my classic five-dollar-garage-sale-circa-nineteen-seventy-six B&D jigsaw (complete with the old B&D logo). This Dewalt blew it away the moment I turned it on. Smooth. But still - I tend to like to have things pretty precise so I clamped my speed square to the 2x8 as a guide -

Then used a long straightedge to cut the diagonal line -

to wind up with this -


The trouble was - I had to do that five more times. And then piece pairs of them together -

And of course they didn't line up perfectly. But I wasn't sweating it - my plan was to use wood filler to fill in the differences, then sand them and make it appear as if each beam was made out of one piece of lumber instead of two -


And then time to prime and paint them. I'll get to that later - instead, now time to do some other work. Like tear out the beautiful light above the door -

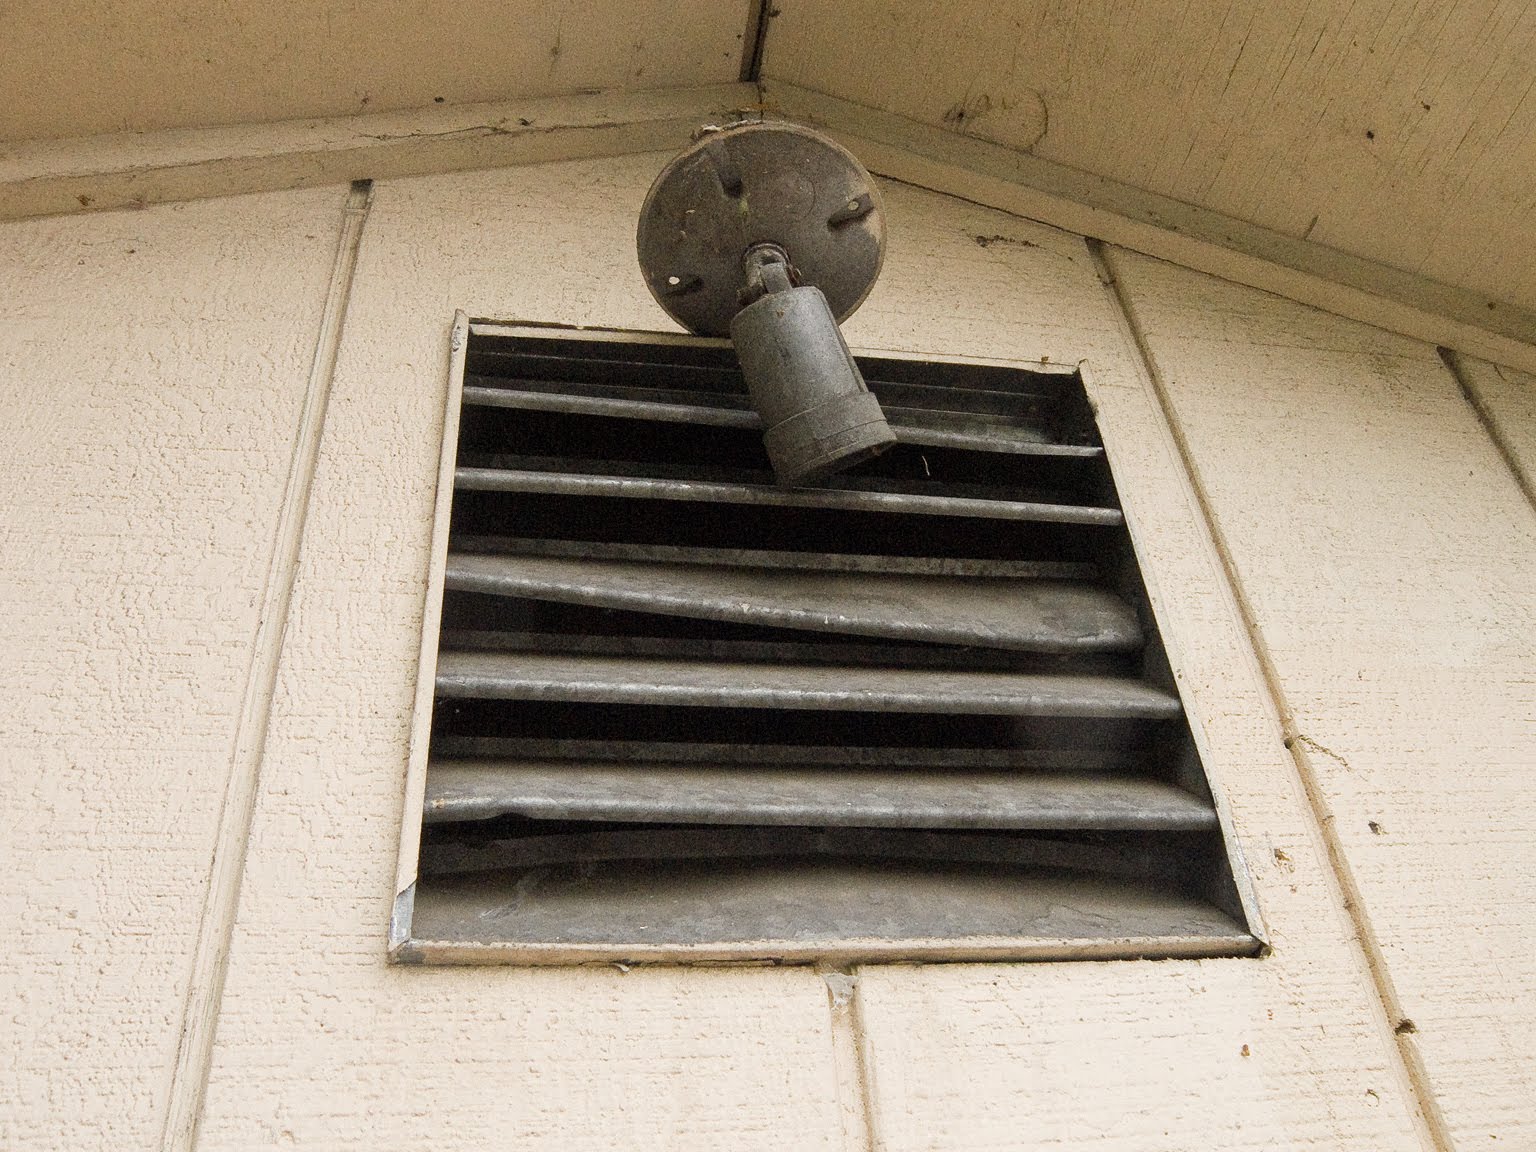
and the other one - plus the spectacular galvanized metal vent - in the gable -


While at Mclendons the other day getting a gallon of the Benjamin Moore Brilliant White and a quart of the Sandy Hook Green, I asked if they had a 12x12-inch cedar gable vent. Well, they didn't - but the guy asked me if I was a carpenter. I sort of shrugged and told him I was a hack-of-a-carpenter. I guess that was acceptable though cos he suggested I just buy some clear cedar and build my own. I liked the idea - so picked up a 1x4 and a 1x3 and a piece of screening material and tonight spent an hour hacking a gable vent together. First I built the box out of the 1x4 -

Then, to figure out the spacing of the slats I wanted a calculator - and realized a garage-sale-find tape measure sitting on the pegboard in front of me had a calculator on it!

How handy that ol' Calcu-Tape ... I knew there was a reason I paid a quarter for it! So with the measurements all figured out, I just had to jot down some lines on the frame -


(uhh, photo courtesy of Katie)

Then grab the router with the chamfer bit I got for the porch railings to create a molding for around the edge - oh and rip the 1x3 down to a 1x2 (instead of, well, buying a 1x2 - in addition to planers, table saws are awesome - should've bought that new-looking Ryobi I saw at a garage sale a couple months ago for $40 ... ) -

The stapler came in super-handy to put it all together -

Then tack the screen to the back -

And wallah - a cedar gable vent -

I'll stain it when I do the shakes after they're hung. Meanwhile - Katie painted some stuff while I had busied myself with all of that -


Her layering up the pieces of wood was pure genius!

---

And that's where I'm at - all the trim is primed and painted. The siding is scraped, pressure washed and all holes filled. Basically the next step is to prime the siding and under the eaves then slap on the Benjamin Moore Sussex Green. Once that is done - it's just a matter of installing a lot of trim and the cedar shake - which will be much faster with the awesome stapler I got last year after finishing the cedar on the house.

Phwew. I love working on the house on warm summer evenings after a day spent working in a stuffy office. A quick snack after getting home - then a few hours of work til dark or past dark - and a light supper and relaxing night. Good times. Good times for sure.

Monday, August 22, 2011


Have nothing in your house which you do not know to be useful or believe to be beautiful.


~ William Morris

Thursday, August 18, 2011

garage door.

Hmm, let's see. For the past five years of owning this house, I have clicked the garage door shut ... then waited twenty seconds or however long it took for it to drop all the way down and - wait for it - perfectly timed it to click the button again when it hit the ground to stop it. You know, to keep it from popping back up. Yep ... five years.

I looked at it probably four-and-a-half years ago - apparently not very hard cos I gave up and just disconnected the lead traveling to the far end of the rail (attached to the sensor that's supposed to stop it when it hits the pavement) cos for some reason it didn't work when that lead was attached.

But today ... after some prodding from Katie on the trainride home and her coming out to look at it while I busied myself testing out the planer (it works great - I'm excited to get to work on the garage trim) - we took a closer look.

It didn't take long for me to see that there was a small piece of metal that was the culprit. The way it works for those not well-versed in the operation of electric garage door mechanisms is the door travels down the rail and trips a little lever that in turn is supposed to push that piece of metal up so it makes an electrical connection - apparently telling the motor to stop. Well - all these years - it turns out the problem was (wait for it ... ) - that piece of metal was bent so it was constantly making that connection. Hence - the reason the door wouldn't go back up if the lead was connected (cos it was sending a 'stop' signal to the motor).

So I simply unbent the metal and wallah - it works! It totally works! Now I'll just have to get used to the fact that I no longer have to wait for it to get to the bottom to press the button again. And in hindsight - it was an incredibly easy fix that for whatever reason I completely missed figuring out four-and-a-half years ago.

ps - all the trim, the 2x4 rakes under the gable and the b-ball hoop are ripped off or down. I need to get a 12x12" square cedar gable vent to replace the crap metal one in there now and another porch light from Rejuvenation (or possibly three - one by the people door and two - one on either side of the garage door).

Thursday, August 11, 2011

garage time.

It's been tough with all the getting out. Which is not necessarily a bad thing. But I have a garage to do this month and literally every weekend is being spent in the mountains. Summer is short here in the Pacific Northwest. Even shorter this year it seems. Has it even really started? Regardless - before I know it autumn will be here for real. Maybe next week.

So ... in the meantime I have a garage to do. Cos maybe after it's done I'll get to do the back patio. But probably not cos it'll get too cold so I'll get to work finishing the low-voltage wiring and drywall and painting in my bedroom instead.

And anyway - well I spent a little time with a tape measure today measuring for trim. The plan is to make the box-of-a-garage look at least a little more like the house. I remember way back when I had the thought of ripping off the roof and redoing it to match the pitch of the house. Well, that's what I would have done had I built the thing. But yeah - not really going to do that since I, well, didn't. Instead - it'll be in the details hopefully that it'll end up looking like it and the house are sort of a pair.

And the details are - well - mostly trim. Here's the fancy sketch I put together today (complete with crayons!) -

The basic idea is to match the trim above the front porch so that looking at the garage behind the house it'll - like I said - look like it goes together. Breaking down how trim is done is sort of fun. Like for the drip cap it's basically a 1x2 combined with a piece of cove molding on the underside. And so on.

But it's usually pretty simple - as in just dimensional stuff. One-by this and two-by that with some ornamental pieces (like the cove) thrown in to keep things interesting. Maybe half an hour later I was done. And an hour combing through the lumber yard at the local Home Depot had me filling Stuart up with 1x8s, 2x8s, 1x6s, 1x2s and the like.

A while ago I snagged a planer for fifty bucks - going to put it to use now. Trevor's got my beautiful chop saw but he'll be wrapped with it in the next couple of days. And I'm going climbing (of course) this weekend anyway. But there'll be some carpentry I'll have to attempt before I'm ready to plug in my compressor and hook my stapler to my belt to bang these things up ... planing some of the one-by stuff from three-quarters thickness to half an inch. Ripping some 1x2s down from an inch-and-a-half wide to just an inch to keep them from sticking out too far. Routing some 1x2s so they fit in between two horizontal 2x8s but still protrude out from them. I have to glue two 2x8s to make the three architectural beams that stick out like on the front of the house - probably plane them a bit first on the side to be glued before cutting out the notched shape with a circ saw (glueing two 2x boards together cos I don't have a way to cleanly cut the notch shape in a 4x piece of lumber - I thought it was rather ingenious when the idea - or more like realization - hit me in the aisle at Homie-D). Going to tear down the 2x4 rakes on the garage gable and replace them with beefier 2x8s (they're pretty decrepit and the paint is all peeling off them anyway) - and have to notch them for the architectural beams. Tear down the 1x4 corner trim on the three corners of the garage I can see and replace with 1x6s to match the house. And of course hang cedar shake in the gable just like I did above the porch.

It'll be fun.

And with all the carpentry work that I'll have to attempt I realize there won't be much painting to do. Especially since I'm - uhh - only doing the two sides I can see. The two sides that face the neighbors' fences I'm not going to touch ... I never see them so why bother? Yeah - makes sense to me.

So anyway - going to get to work over the next few weeks starting with the planing and such before I can roll on primer and then hang them. I actually really like doing carpentry even if I'm a total hack at it. There won't be much scraping to do cos most of the chipped paint is on trim that I'm tearing off - haha. I should have enough of the Sussex Green left from last year to paint the two sides of the garage, but I'll probably have to pick up a quart of the Sandy Hook Green (the lighter stuff) and maybe another gallon of the Brilliant White.

And after it's all finished hopefully it'll look like it sort of matches the house. Just what to do then about the garage door ... oh, and lights ... but I'll get to that.

Saturday, May 14, 2011

garage sales and patio stuff.

So we've hit up a few garage sales here and there this year, but today was the official kickoff of the season with the annual Lakeland Hills community sale. Community sales are the best cos you can hit lots of houses with minimal effort. Too many in this community in fact. But it was a rocking good day - sunny and sixties and unexpected (was supposed to be rain) and quite literally one of the first sales we drove up to (glad I took Stuart!) I got a pressure washer for $20 and an 8' Werner fiberglass ladder for $5 (we later saw that same ladder today at a store for $100) -

Sweet. And another $5 burr grinder -

Awesome. Some more speakers for $5, a 24-hub switch for $2 (though not gigabit, but thanks to Leopard's crap nonsense I'm stuck in 100x speeds until I likely downgrade all of our Macs back to Tiger - quickly becoming IMO the last great Mac OS but I digress ... ) and some other stuff.

We had Stuart properly filled - we hit up the new Pick Quick location for lunch before trucking it back home.

And then I got to work in the garage putting together a quick mockup of my new patio cover design. After finding a lumber outlet in Tacoma (Trevor got all the lumber for his fence there last year) that sells cedar for the same price as crap treated stuff, I moved to an all-cedar design. And because I can't get über-cheap cedar in lots of dimensions (and to keep this from being über-expensive) I had to redesign my plan a bit. I knew I would. It's what I do.

So in keeping with my fondness for multiple depths to designs, I am using 4x4 cedar posts for the six vertical supports I'll pour cement footing for and then tacking on 1x6s (that I'm ripping an inch off so they only stick out 1/2" from each side of the 4x4) to give the posts some dimension.

But backing up some - I also found a guy here in town that sells cedar directly from a mill out of his driveway so I hit him up for some samples more or less on a handshake that I'd be back for more. He had the 1x6s and 2x4s which I am thinking of using for the overhead beams. So I cut and ripped this stuff down today and put it together.

First had to cut the notch for where the 4x4s will cross each other - took a circ saw set to a depth of 1-3/4" (half the depth of a 4x4) and hacked across each 4x4 with cuts set about 3/4" apart (the width of my chisel - which I've since bought a wider one) by just moving my trusty speed square I was using as a guide -


Then it was a simple matter of chiseling out the scraps -

times two and - wallah - intersecting 4x4s -

Then I quick tacked on the 1x6 that I had ripped to 1x5 -

and tested out the stain I had leftover from doing the cedar shakes in the porch gable last year (the nice custom mix that the guy at Mclendons made up for me that I'll have to get to mix me up another gallon) -

I'm afraid the dimensions of the wood I'm using are going to yield a patio cover that looks sort of tiny (such as no 4x8s or 4x6s - of which that one I was using as a sample had lots of) and only 2x4s as the cross beams (instead of 4x6s) - which is why I wanted to put together this little mockup - to check the scale of it in real-life as opposed to the sketches I have worked up.

But - those larger dimensions would probably make this patio cover exponentially more expensive (like that guy could order me 2x4x16s from the mill but the price goes from $4 for a 2x4x8 to $1.50/lin ft or $24 vs. $8 for two 8-foot sections connected in the middle multiplied by sixteen which is how many cross beams I have designed to use). And 4x6 or 4x8 cedar posts would probably be quite expensive as well - and not sure where I'd find them.

And - as I am now - keeping in mind the fact I am going to be moving at some point in the relatively near future ... no sense in going overboard. Spending the money instead on some nice patio furniture and a gas heater that I can take with me to my next house ... and hoping it'll look good anyway with the garage finished, some Christmas lights looped around it and hanging out on warm summer evenings.

Time to buy some lumber.

Monday, May 2, 2011

patio.

So we had our first really nice weather weekend these last two days and that, well, makes me want to work on stuff outside. So yeah - the bathroom sits, still mostly gutted, waiting for ... I'm not sure what.

But now - like I was out of nowhere completely random about building new stair railings and the subsequent complete painting of my house - I am motivated on something just as ridiculous ... putting in the back patio and then - building a patio cover over it.

I know - I should be doing a lot of other things. The garage overhaul will also for-sure come this summer. But during the month of May I'm now thinking I will spend it finishing the backyard landscaping and, well, putting in a patio and such.

So once I put in the two front sidewalks using a combination of 6x6 and 6x9 cement pavers, I realized it (like most - er, all - of this remodeling business) ain't rocket science and decided at once to use the same pavers for the patio I've been planning for something like four years = since I had the yard tore out, regraded and planted anew. Which is just to say at that time I measured out the 12x20' space that would become the patio and didn't plant any seeds so ... it turned into a 12x20' weed garden. Good times.

But that just say I've had this plan for a while now and it's time to act on it. Building the patio will be easy, if not a bit back-breaking but hopefully all-in-all not terrible. It'll take a truckload (or two) of sand from the landscaping place I pick up my mulch and now stones. And a truckload (or two) of pavers from the Depot (haven't been able to find them anywhere else). Removing a lot of weeds and leveling the whole two-hundred-and-forty square feet before dumping in the sand. Tamping it all down then starting to insert the pavers. One. At. A. Time.

It'll be tons of fun, but it'll look nice (hopefully) when it's done. Then the real fun will start ... building a patio cover.

Luckily - like the space - I've had a plan in mind for years based off this random structure in the middle of a parking lot at a nearby elementary school. Yeah, I have no idea why it's there but the first time I saw it I remember thinking 'that would make a cool patio cover.' And so today I biked over there with my camera to take some detailed photos of how it was put together, then with a tape measure and some graph paper to sketch out all the measurements and dimensions so I could figure out how much lumber I would need.


Yikes - that's a lot of lumber ... must find a place to get cheap - ideally recycled - lumber.

And a couple notes to self -

- run an electrical conduit from the garage to one of the posts and put in a double-gang outlet - for Christmas lights, the charcoal lighter and the iPod dock or something
- build the plans from knockoffwood for the chaise lounges
- incorporate a clothesline on the patio cover
- put in a fruit/vegetable garden in the strip between the patio and the garage

Monday, April 11, 2011

just some photos of a particularly cool sunset.

So just some photos ... the other week, as the sun set the light got all mad-crazy and despite not being somewhere amazing like of course surrounded by mountains still just on my front porch it was pretty cool.


landscaping.

Well this weekend has been pretty busy. Let's see ... Saturday ...

After forgetting I put my wallet in Katie's purse and having to drive to Tacoma and interrupt her girls' lunch at the Harmon to grab it, I then had to haul it all the way back to the awesome Toyota salvage yard in good ol' Buckley to pick up a set of original alloy rims for Stuart. Yeah, I've never been a fan of his 'mudders' as Trevor called them (never knew big, fat obnoxious truck wheels had a name, but there it is), the two back ones had a constant slow leak, the tread on all of them was pretty much past the end of their life and I just wanted to be rid of them. So Stuart got a makeover -


He was excited. Now he feels more like a normal, cool old-school Toyota truck instead of some pimped-out thing.

And this also meant I got to experience (for the first time) the land of the used tire business. Yeah, there was no way I was buying new tires for Stuart (just did that exciting business for Spencer). So off to find a used tire place I went yesterday afternoon. They seem to be everywhere so it must be a thriving industry. Makes sense, I guess.

So anyways, I found one right here in town (umm, no surprise there really) and hit them up for a set of four 175/75R15s (cash only of course) ... of which he had a couple piles out back. After scrounging through them, we gathered four (uhh, one ended up having a gash in it - had to go back and select another from the lot) and whisked them around to get the water out. Good times. Then he mounted and balanced them - dumped them in a tub of water to check for leaks (one had a leak - had to seal it up) and about an hour later I was off to install them myself.

So after probably another hour and having to drag out at least half a dozen tools to get one of the hub caps from the chrome mudders off (including a sawzall armed with a metal blade), Stuart had four new feet and was all happy. So was I.

Oh - and I had also run over with him to the local landscaping yard to pick out half a yard of rock. The plan has been for awhile now to get some and make borders around all my flower beds. Last fall, while waiting for the bulldozer driver to come around - I noticed they sold a lot of crushed rock options of which one in particular I thought would make a nice border.

So I finally hit it up yesterday and had the guy dump in half a yard of rock. Whoa - Stuart's suspension was like 'hurry home and unload this stuff!' Which I did.

So then today it was landscaping time. And for which I thought I was properly dressed -

Complete with Mountain Hardware 3/4 pants and my beloved Tretorn Strålas (no, seriously those boots are awesome for yard work) that I found rummaging through the clearance racks at REI ... I was at it.

Had no idea what I was doing of course, but it couldn't be that hard. Afterall, I've put in an entirely new yard and laid two sidewalks so this should be a piece of cake.

Well, it started off slow as I figured out what to do. First, used my flat shovel to cut away the grass, then a skinny one to peel it out and toss it in Trevor's wheelbarrow (mine was full of the rocks I had got) -

The biggest pain was the edging I discovered I had stashed up high on a shelf in my garage - the stuff was impossible to bend and get into shape (I ran out, so a trip to Mclendon's produced better edging and another box of spikes) but I figured out to jam the spikes through it to get it to stay better -

Then I threw in some strips of the über-weed cloth to hopefully keep weeds from growing up in the rocks -

Then tossed in the rocks, flattened and spread them out by running the shovel across them and ... wallah -


Rock borders. So next then is the bed in the back of the house of which now is a pretty big mess (though thanks Katie for weeding it the other week). I planted some heather last week but it needs an overhaul, along with the rock edge treatment -

Then there is a bed all along the south side of the house, in the front where the trees are, one on the side and another surrounding the back corner. So a lot more landscaping to do this spring/summer. Hopefully to include putting in the back patio (which will be the same cement pavers I used for the two front sidewalks).

Oh and in that second-to-last photo (the one of the front of the house), the screens I built last weekend are up (all the windows now have screens - I used the idea I came up with last fall to build them).

Now just bring on the warm weather so I can open the flippin' windows!

Monday, March 21, 2011

audio stuff again.

So it's baseball season again - Julian's first practice is Saturday. Which meant a trip to the local Goodwill to try to find some cleats that he'll wear for two months, trash and outgrow. So after finding him some and while Katie perused the clothes looking for a good find or two, J and I wandered around the aisles mostly just for fun - like, to make fun of the circ saw that someone had spliced a plug onto the cable and then wrapped with electrical tape. Yeah - I trust that thing won't short out and kill me.

But amongst the 19" CRT televisions and CD changers circa 1998 I saw a Klipsch subwoofer. $39.99. There was an outlet nearby so I plugged it in and turned it on - worked. Well, at least it turned on. But both speaker surrounds were good (it has an 8" woofer coupled with a 10" passive radiator on the back) so I hemmed and hawed - then finally plunked down the forty bucks and took it home to see if it would actually work.

Well - it did.

Downloaded the manual (although hooking it up to my Pioneer receiver with it's dedicated subwoofer-out was a no-brainer) and then took it for a spin. Put in some Loreena McKennitt with some standard hard-hitting, deep bass drum hits and flipped the phase switch back and forth. Then some Muse. Pretty cool, especially for forty bucks.

But what I really am thinking of doing is heaving it over to the studio and plugging it into the G5 Mac and then plugging the M-Audio BX4A's into the sub (taking advantage of its 80Hz high-pass filter on the line-level input to weed out low frequencies from those little 4" drivers) so I can hear some real bass while mixing (especially since my home audio speakers have 10" woofers and put out a lot of bass on their own). That may just suffice for the studio needs rather than plunking down $300-400 for a pair of 8" monitors. Or so goes my thinking ... we'll see.

Or ... we'll have some serious bass for our music and movie soundtracks.